How to Install SQL Server Management System for SQL Server 2016
This page contains screenshots of the steps involved in installing SQL Server Management System (SSMS) for SQL Server 2016.
Installing SQL Server 2016 installs many things but it doesn't install SQL Server Management Studio (SSMS). Therefore, if you need to use it, you need to install SSMS separately. Here's how.
-
Start the Wizard
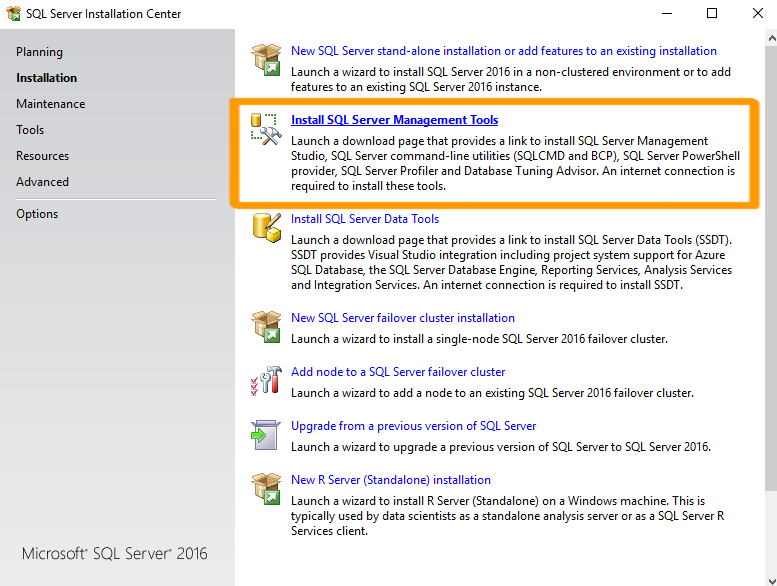
This is done from the same SQL Server Installation Center that you use when installing SQL Server.
So from the SQL Server Installation Center, ensuring that Installation is selected in the left menu, click the second option (Install SQL Server Management Tools).
If you don't have the SQL Server Installation Center open, locate the SQL Server download package and double-click Setup.
-
Start the Installation

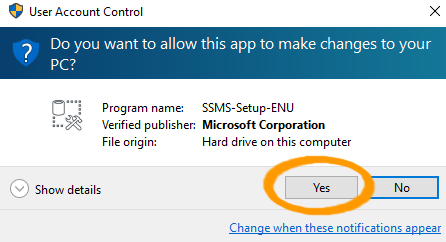
Click Install.
Click Yes if you get asked if you want this app to make changes to your PC.
The wizard will download and install SQL Server Management Studio. It could take a while.
-
Setup Complete
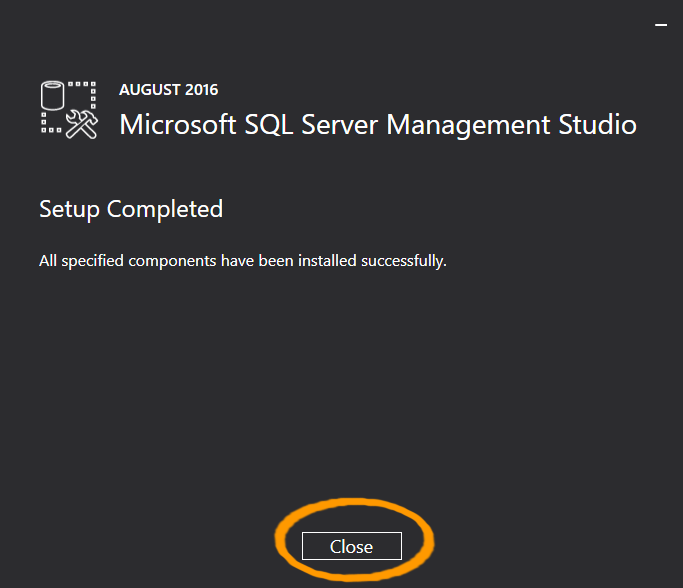
After the wizard has completed the installation, a success message is displayed.
Click Close to exit the wizard.
-
Open SSMS
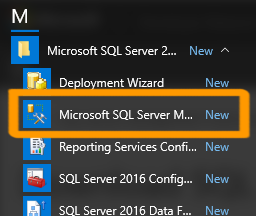
You can now open SQL Server Management Studio by finding it in your Windows apps list. It is located as a sub group of Microsoft SQL Server 2016.