SQL Server 2016: Import Data
SQL Server Management Studio includes an import wizard to help you import data from an external source.
You can import data to your SQL Server database from various other sources, including Excel spreadsheets, CSV files, and other databases such as Oracle, Access, and other SQL Server instances.
Import a CSV File
Right now we'll import a CSV file into our Albums table that we created earlier when we created a relationship.
You can download the CSV file here: Albums.csv
The file contains the following contents:
AlbumId,AlbumName,ReleaseDate,ArtistId,GenreId

1,Powerslave,1984-09-03,1,1

2,Powerage,1978-05-05,2,1

3,Singing Down the Lane,1956-01-01,6,3

4,Ziltoid the Omniscient,2007-05-21,5,1

5,Casualties of Cool,2014-05-14,5,1

6,Epicloud,2012-09-18,5,1

7,Somewhere in Time,1986-09-29,1,1

8,Piece of Mind,1983-05-16,1,1

9,Killers,1981-02-02,1,1

10,No Prayer for the Dying,1990-10-01,1,1

11,No Sound Without Silence,2014-09-12,9,4

12,Big Swing Face,1967-06-01,4,2

13,Blue Night,2000-11-01,12,4

14,Eternity,2008-10-27,12,4

15,Scandinavia,2012-06-11,12,4

16,Long Lost Suitcase,2015-10-09,7,4

17,Praise & Blame,2010-06-26,7,4

18,Along Came Jones,1965-05-21,7,4

19,All Night Wrong,2002-05-05,3,2

20,The Sixteen Men of Tain,2000-03-20,3,2
So save the above file into a location that you'll be able to get to from the SQL Server Import and Export Wizard, and let's get started.
-
Import Data
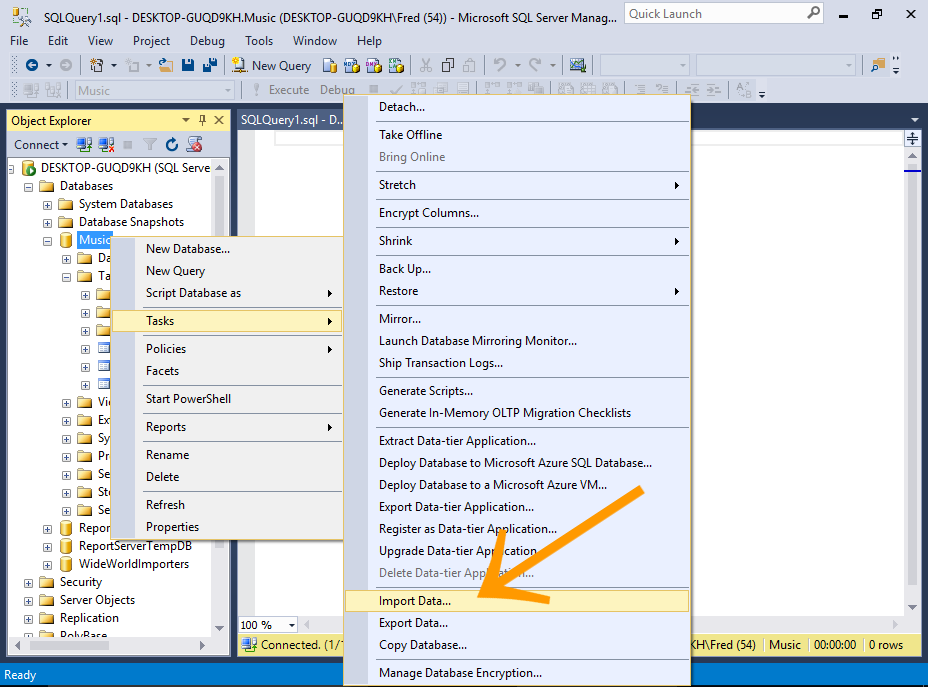
Right-click on the database and select Tasks > Import Data...
You can also access the import wizard from various other places, including the Windows Start menu, the command prompt, and Visual Studio with SQL Server Data Tools (SSDT).
-
Welcome to the SQL Server Import and Export Wizard
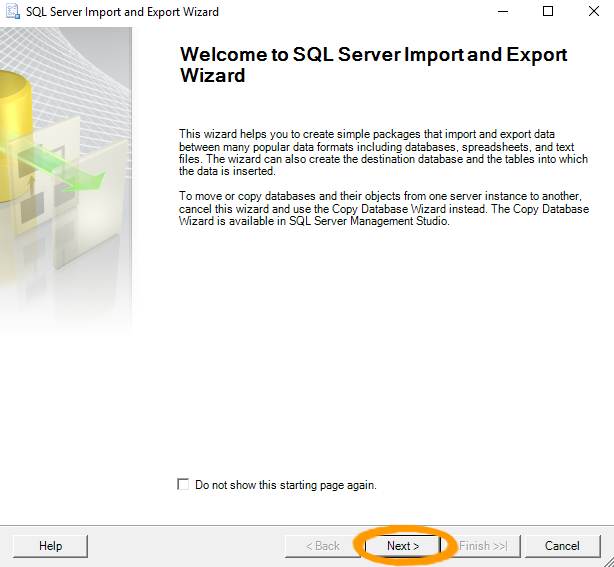
The SQL Server Import and Export Wizard start page is displayed.
Click Next >.
Check Do not show this starting page again if you want to save time and clicks in the future.
-
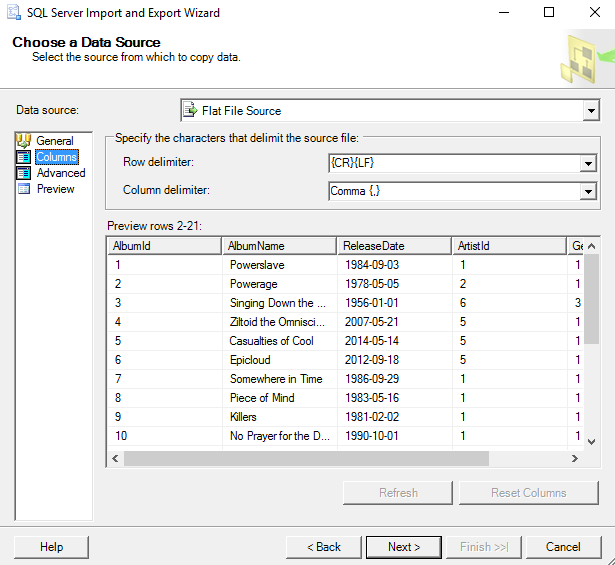
Choose a Data Source
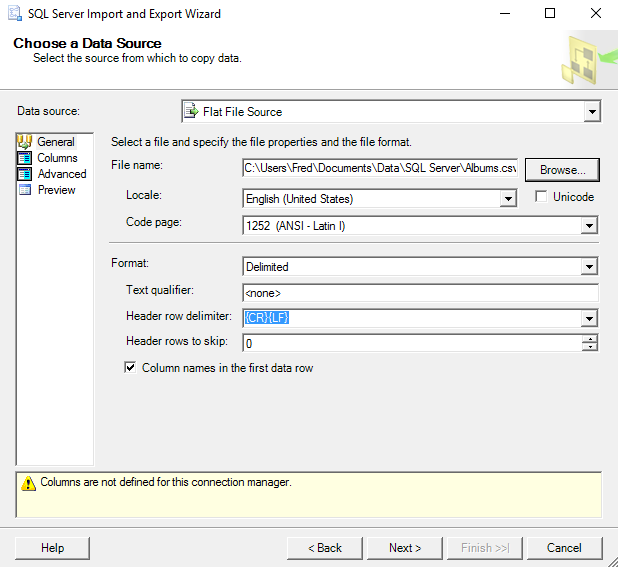
Select the file type and its location.
Ours is a CSV file, so select Flat File Source then browse to the file's location.
Also click on Columns in the left menu to check the delimiter settings, and the other options too if you like. The default settings should be fine in our case.
-
Advanced Settings
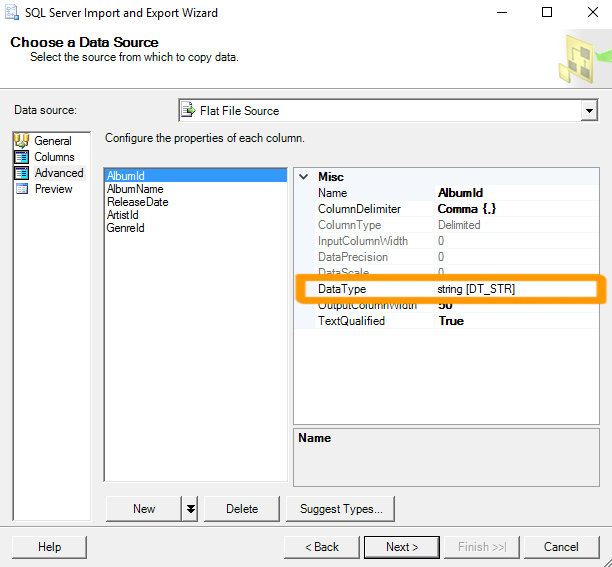
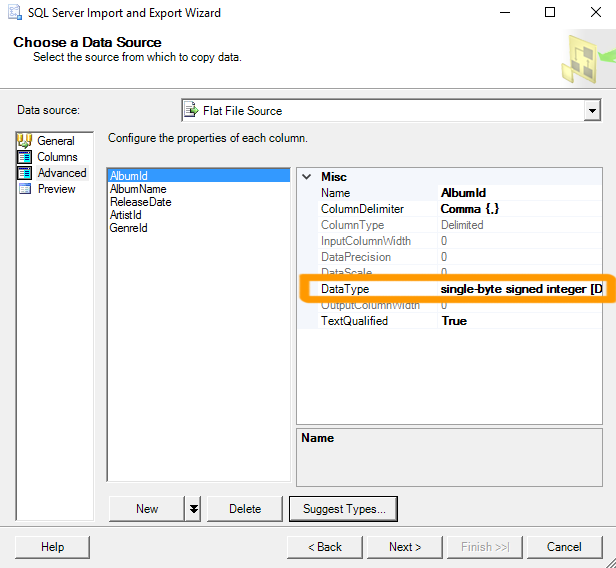
Check the advanced settings (by clicking on Advanced in the left menu) to make sure nothing looks out of the ordinary.
Click on each column name to view the properties for that column.
In our case, you may find that all columns are listed with a data type of string [DT_STR], which could cause problems later on in the wizard.
Take this opportunity to change the data types to the following:
AlbumId single-byte unsigned integer [DT_UI1] AlbumName Unicode string [DT_WSTR] ReleaseDate database date [DT_DBDATE] ArtistId single-byte unsigned integer [DT_UI1] GenreId single-byte unsigned integer [DT_UI1] You can also use the Suggest Types... option. However, you may still need to modify some columns manually.
The wizard will warn you later on if it thinks there will be any issues converting data types from the source file. If that happens, you may need to come back and modify your selection here.
-
Choose a Destination
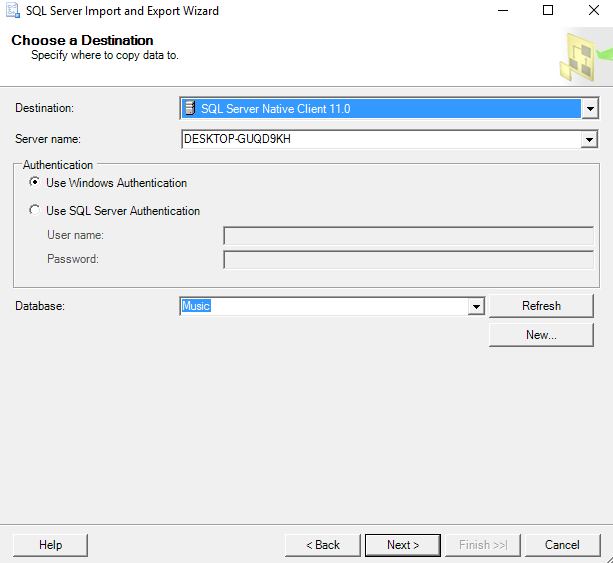
Here, you choose the data provider that matches the data storage format of the destination.
There are various options for SQL Server (SQL Server Native Client, the Microsoft OLE DB Provider for SQL Server, or the .NET Framework Data Provider for SQL Server). We'll choose the native client.
Select the SQL Server Native Client option drop-down list. If you need to change the Authentication mode and/or the destination database, do so now.
Click Next > to continue.
-
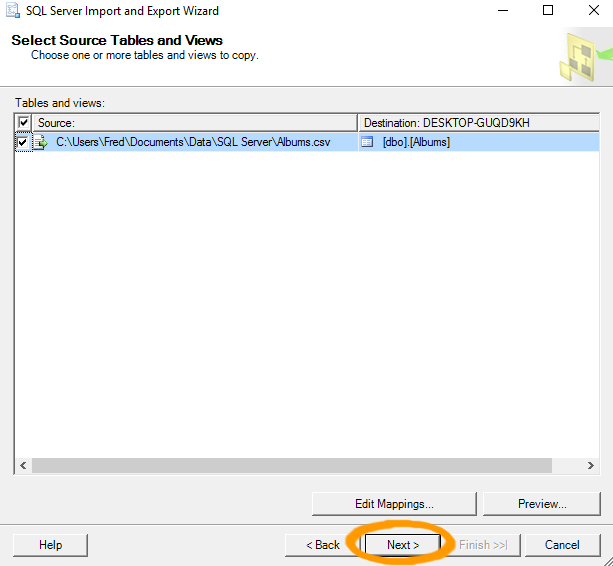
Select Source Tables and Views
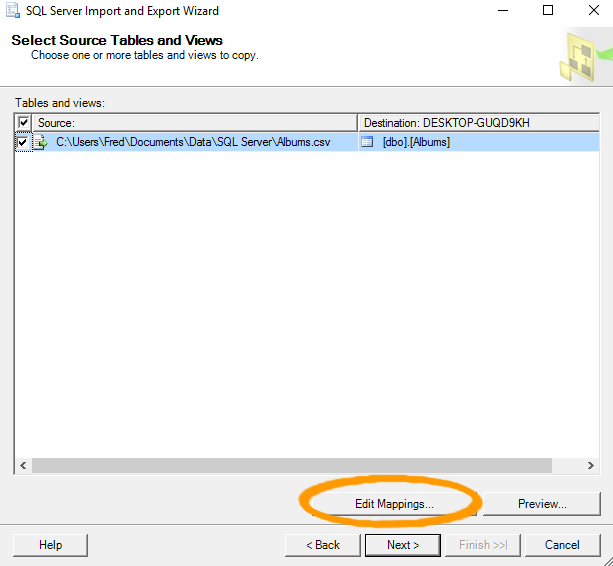
Here, you get to select the source and destination.
Ours is a simple one and everything is selected correctly by default.
However, before continuing, click Edit Mappings... to review the column mappings.
-
Column Mappings
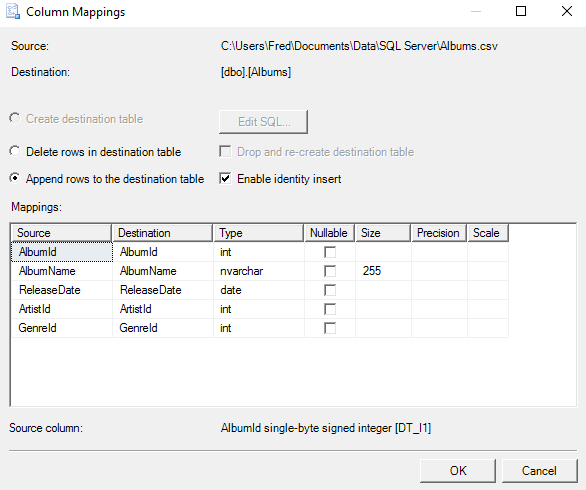
Check that the column mappings and other details are correct.
For our example, we need to make sure that Append rows to destination table is checked, and that the source and destination columns match, and with the correct data type.
Also check Enable identity insert to keep our existing values for the primary key column. This will insert the values from our file, rather than have SQL Server auto-generate them.
Click OK or Cancel to close the dialog box.
Then, once back in the Select Source Tables and Views dialog box, click Next > to continue.
If Create destination table is selected and the Append rows to destination table option is grayed out, check that the name of the source file matches the name of the destination table.
Also check its case (eg. artists.csv vs Artists.csv).
If your import file doesn't contain an identity column, leave Enable identity insert unchecked.
-
Review Data Type Mapping
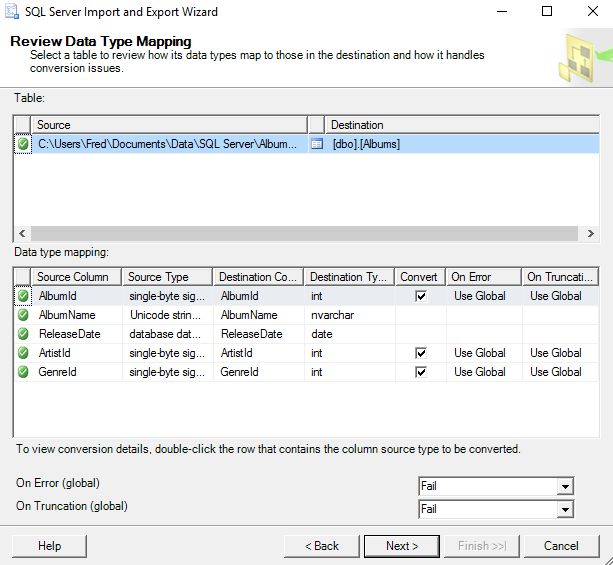
Here's our chance to review the data type mappings that we set up earlier. If the wizard thinks there could be a problem with converting data types, it will warn you on this screen.
If all looks good, click Next >.
-
Save and Run the Package
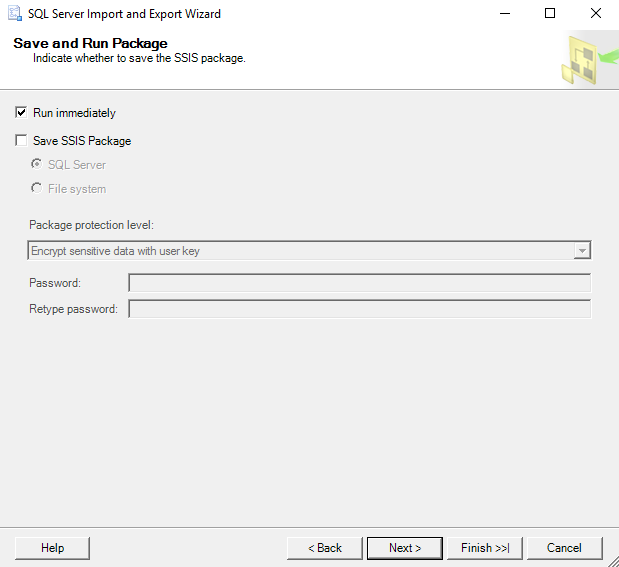
The wizard gives you the option of saving the package so that you can use it again later.
In our case, we won't bother saving it.
Just keep Run immediately selected and click Next >.
-
Complete the Wizard
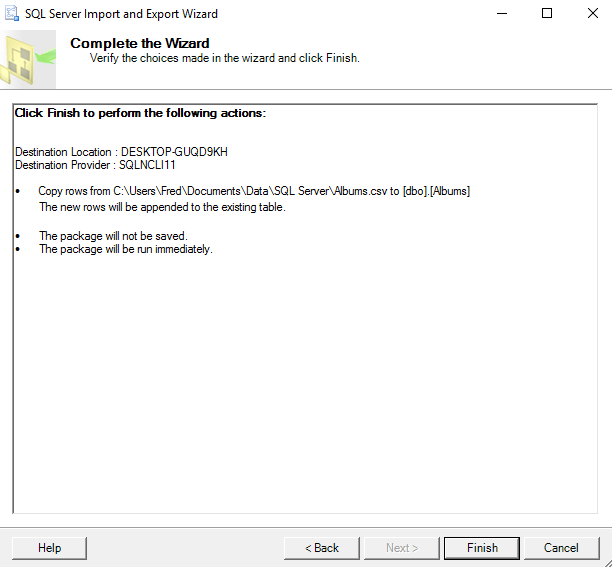
One last chance to review all actions.
If it all looks good, click Finish.
-
Execution Report: Success or Failure
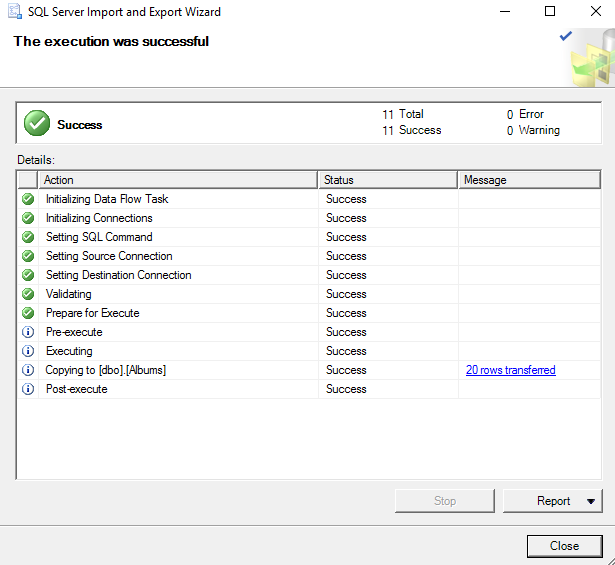
The wizard will now try to execute the import. If there were any errors, they will be listed on this screen, and you will need to go back and correct the cause, before running it again.
If you get The execution was successful, click Close.
You can also save a report of the import by using the Report option on this screen.
-
Check the Data
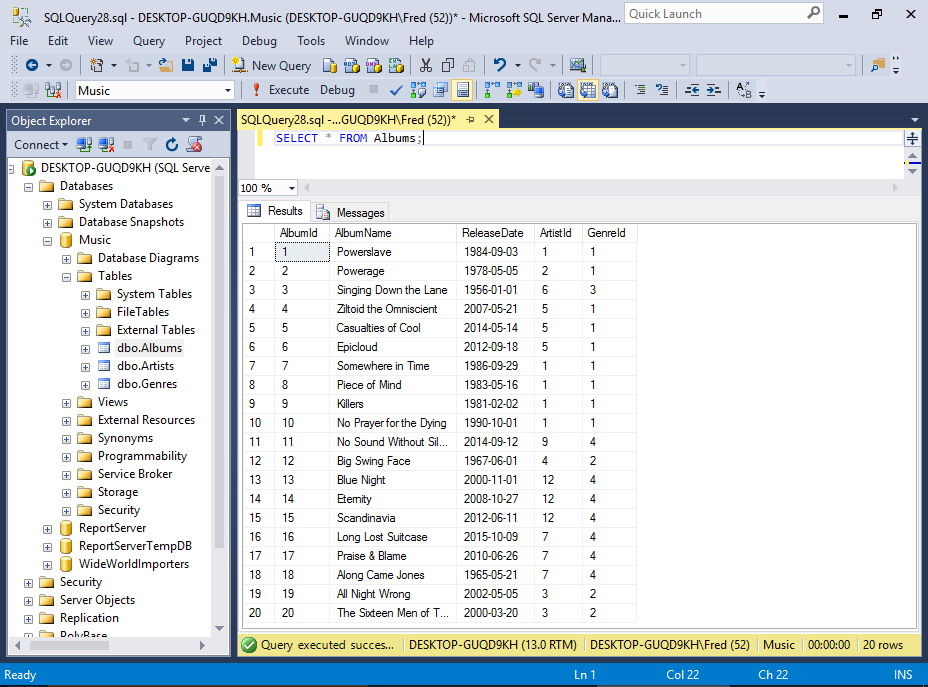
Now run a quick query to see for yourself that the data has in fact been inserted.
You can either use the Select Top 1000 Rows option (after right-clicking on the table), or just run SELECT * FROM Albums;.
If your table contains a lot of data, you should probably limit the results by using TOP 1000 or some other number.