SQL Server 2016: Create a View
In SQL Server, you can queries as views. Views are beneficial for many reasons, including security, usability, and convenience.
In SQL Server, a view is a virtual table whose contents are defined by a query. It is basically a pre-written query that is stored on the database.
A view consists of a SELECT statement, and when you run a query against the view, you see the results of it like you would when opening a table. Views are referred to as virtual tables because they can pull together data from multiple tables, as well as aggregate data, and present it as though it is a single table.
Benefits of Views
A view can be useful when there are multiple users with different levels of access, who all need to see portions of the data in the database (but not necessarily all of the data). Views can do the following:
- Restrict access to specific rows in a table
- Restrict access to specific columns in a table
- Join columns from multiple tables and present them as though they are part of a single table
- Present aggregate information (such as the results of the
COUNT()function)
How to Create a View
You create a view by using the CREATE VIEW statement, followed by the SELECT statement.
CREATE VIEW ViewName

AS

SELECT ...
We'll now create a view from our previous query.
-
Design the View

Take the query from our previous example, and prefix it with CREATE VIEW RecentAlbums AS.
Also remove the
ORDER BYclause, because views don't support this clause (unlessTOP,OFFSETorFOR XMLis also specified).Also add a semicolon to the end of the statement, as a statement terminator (more on that below).
Sample Code
Below is the code from our example, with the
ORDER BYclause removed, and a semicolon added as a statement terminator.I've also reformatted it a bit to make it more readable).
In this example I added a semicolon to the end of the view. The Query Designer didn't include this, but it's good practice to include it.
The semicolon is part of the ANSI SQL-92 standard. It is a statement terminator character.
Also, Microsoft has announced that non-semicolon ending Transact-SQL statements are deprecated in SQL Server 2016, and they won't be supported in a future version (SQL Server has historically used the
GOkeyword as a statement terminator instead of the semicolon). -
Execute the View
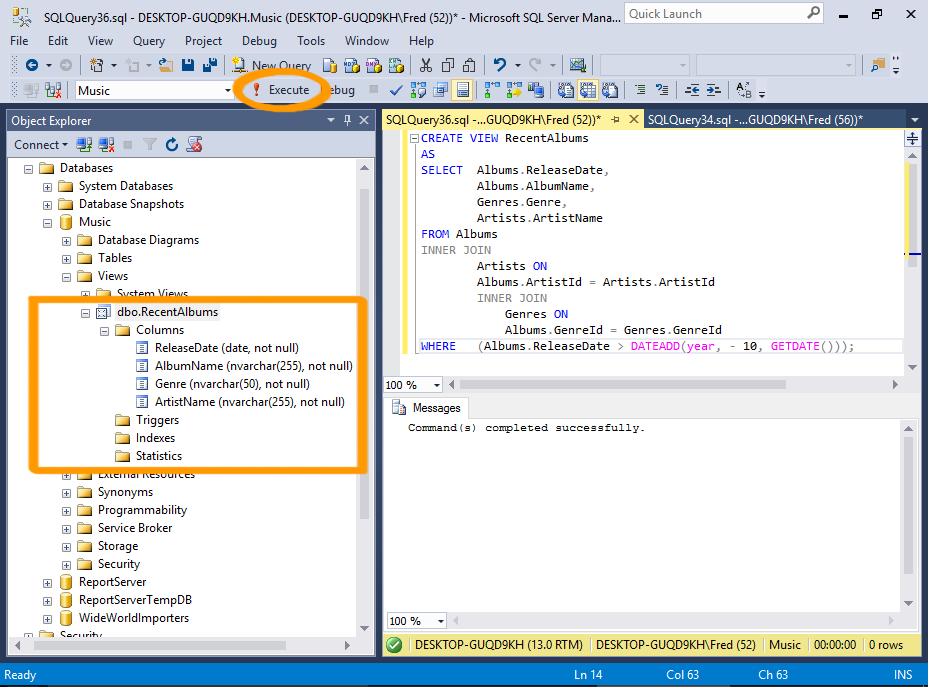
Now execute the view just as you would execute any other query.
Click Execute on the toolbar.
You can now navigate to the view in the Object Explorer. Expand it and you'll see the columns and their data types and properties — as though it was a table.
-
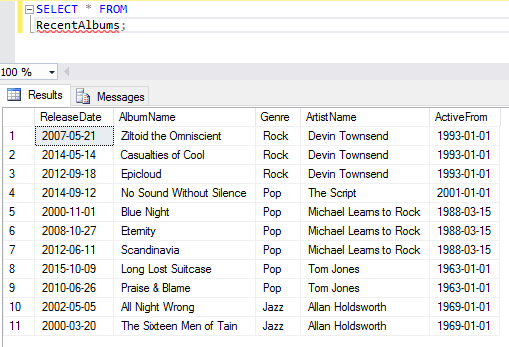
Query the View
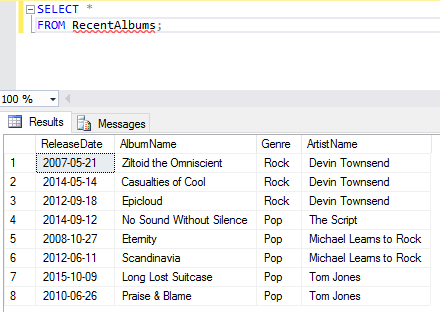
Now that the view has been created, you can query the view by running a
SELECTstatement against it.So you can query our newly created view by using
SELECT * FROM RecentAlbums;. -
Filter the View
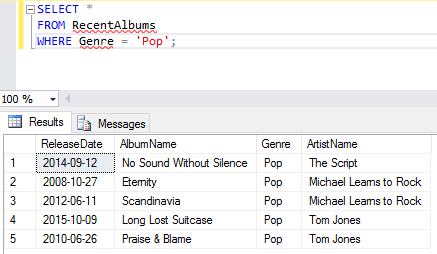
One of the good things about views is, you can apply your own filtering criteria against them — further filtering the results.
For example, you could add
WHERE Genre = 'Pop', so that the view only returns pop albums from the last 10 years.
Alter a View
You can modify your view by using the ALTER VIEW statement instead of the CREATE VIEW statement.
-
Design the Altered View
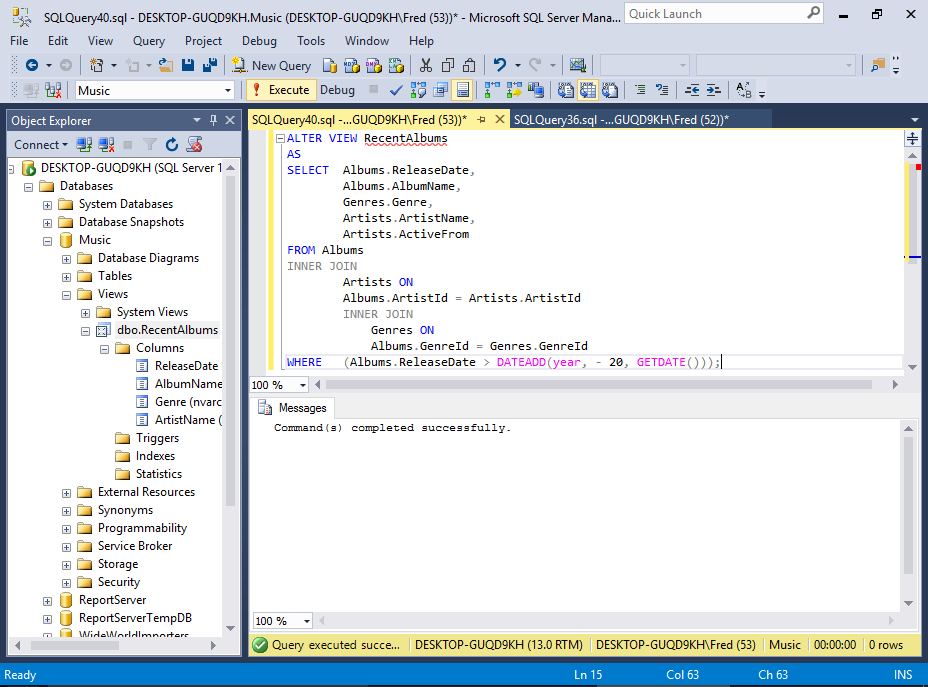
Here we will modify our view to return albums over the past 20 years instead of just 10.
It's a pretty old school collection, so any album released within the last 20 years is classified as "recent" :)
We'll also return another column: Artists.ActiveFrom
Sample Code
Here's the code we use for the example:
-
Query the View
Now, querying the view will return 20 years worth of albums. It will also display the date the artist was active from.