SQL Server 2016: Save Query Results to a CSV File
You can save the results of any query to a CSV file with little more than a click of the mouse.
SQL Server makes it easy for you to save the results of a query to a CSV file (or other text file).
Here's how.
-
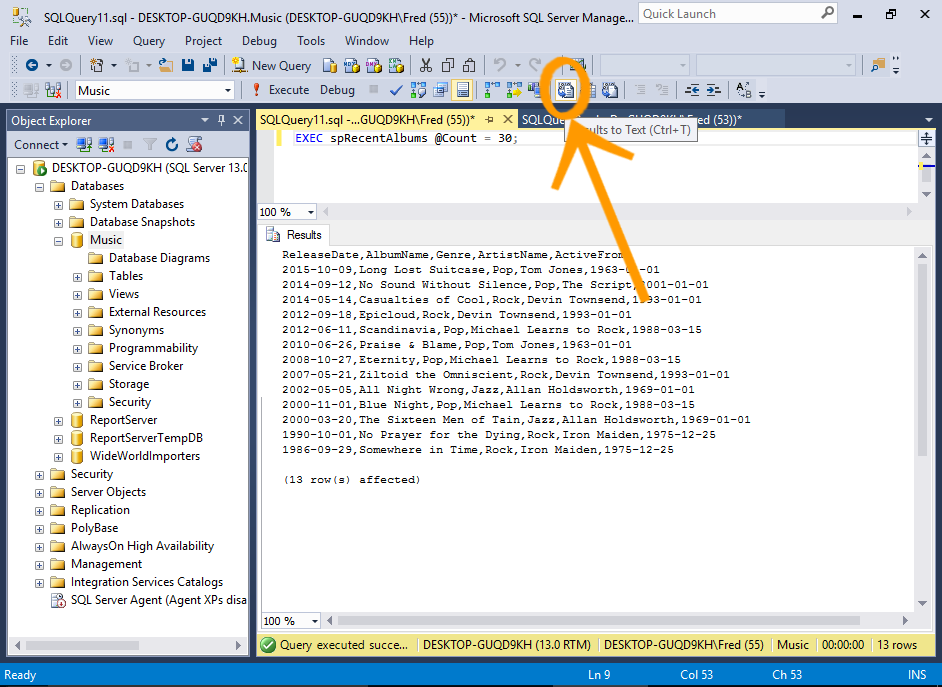
Query Results
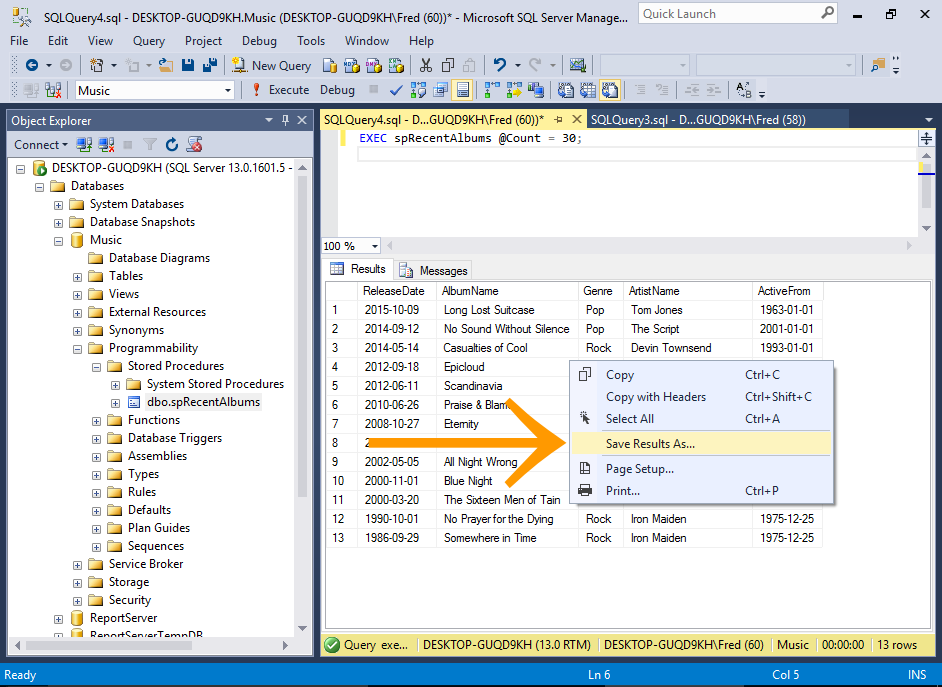
Run a query.
Now right-click in the Results Pane and select Save Results As... from the contextual menu.
-
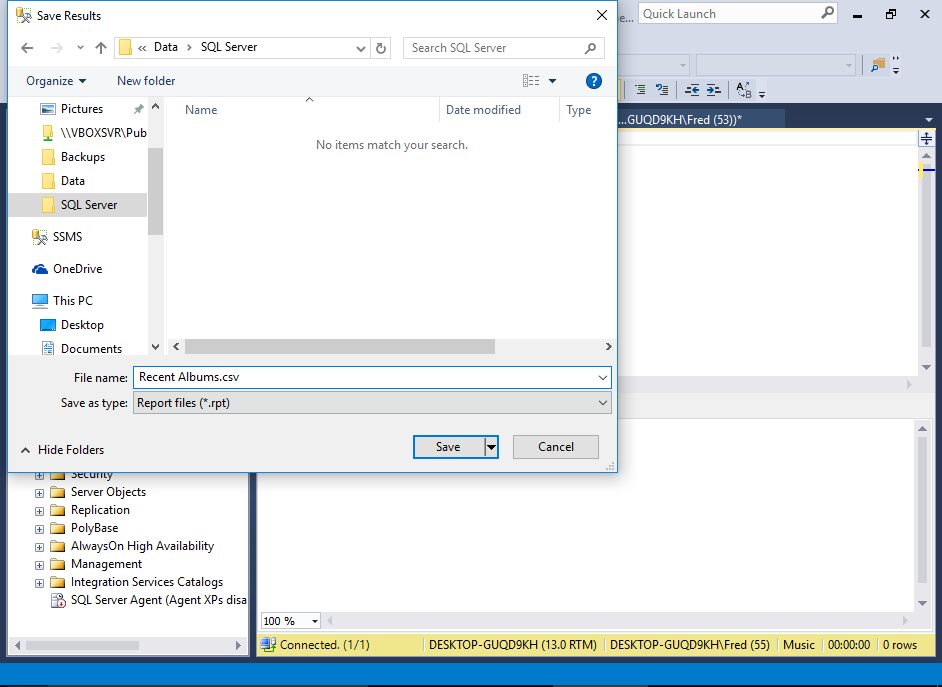
Save the File
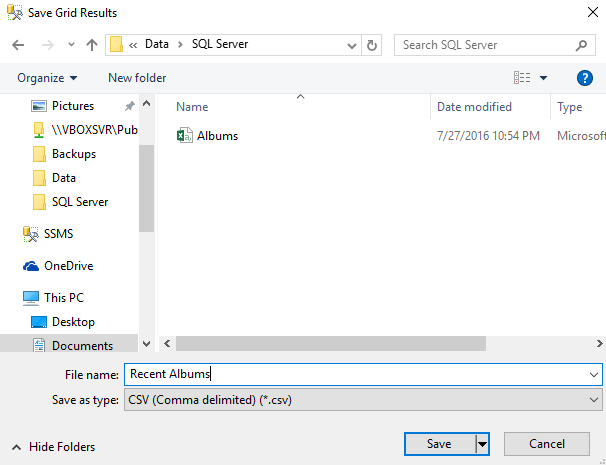
Name the file and location and click Save.
-
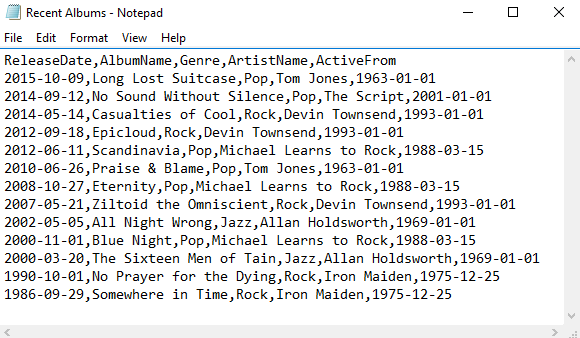
Open the File
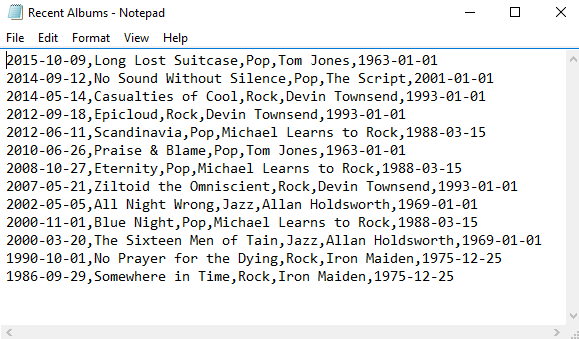
Now locate the file and open it in Notepad (or your preferred application for opening CSV files).
You can see the results have been saved in CSV format.
Add a Header Row
You might have noticed that the above CSV file doesn't contain a header row.
This may or may not be what you want.
If you need it to contain a header row, do the following.
-
Launch the Query Options Dialog Box
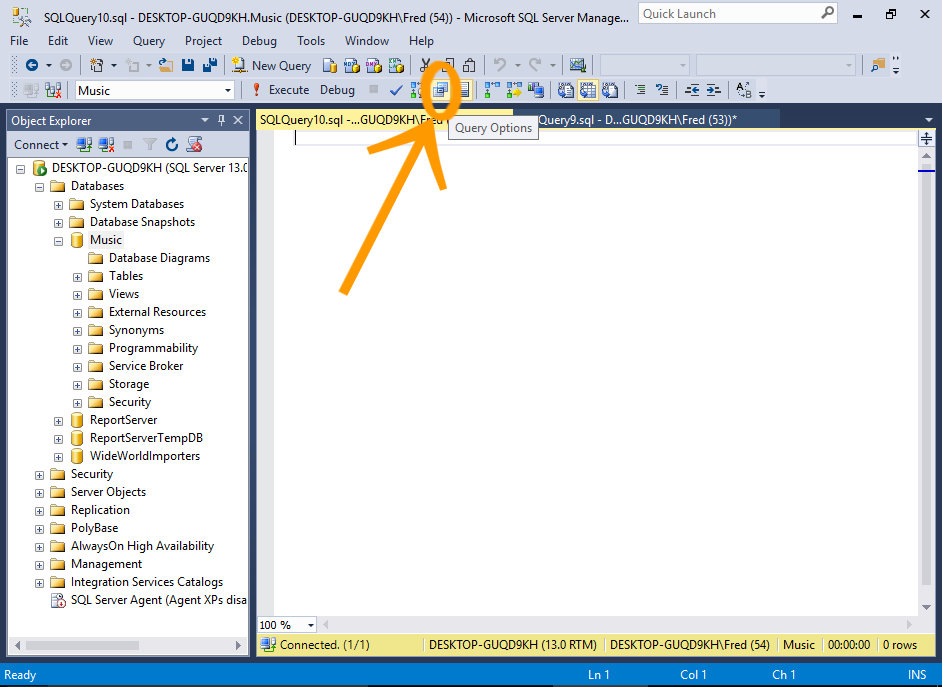
Open a new query window, and click the Query Options icon in the toolbar.
You can also go to Tools > Options in the top menu.
-
Include Column Headers
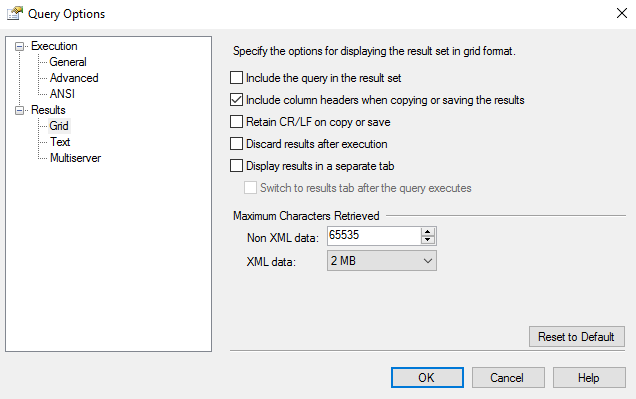
Under Results > Grid, put a check mark next to Include column headers when copying or saving the results.
-
Save another Query and Check the File
Now, run another query, save it, then check the file.
When you open the file, it will contain column headers.
Results to File
You can also use the Results to File option for saving your query results to a file.
This option will prompt you to save the results whenever you run a query. So this can be handy if you have many queries to save.
-
Select the Results to File Option
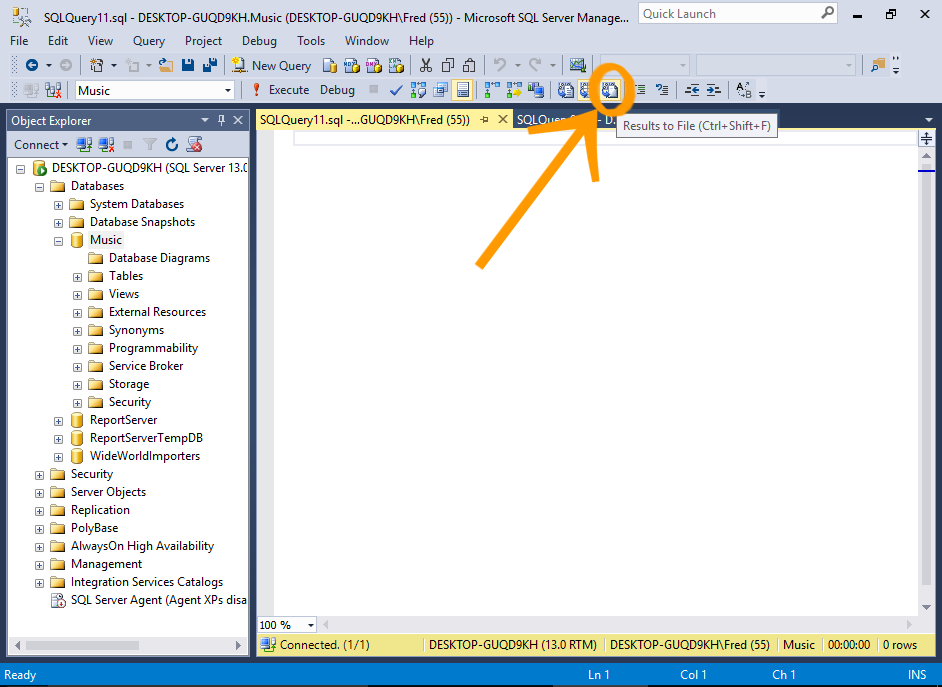
Open a new query window, and click the Results to File icon in the toolbar.
You can also right-click in the query window and select Results To > Results to File.
-
Run a Query
Now run a query. You will be prompted to save the file (instead of the results being shown in the bottom pane).
You may have the option to save it as a
.rpt file. This is fine if you can open it in Crystal Reports or a similar application. If not, you can change the extension to.csv . -
View the File

Check the file to verify that its contents are correct, and in the required format.
Results to File Options
You might have noticed that the above screenshot shows that the text file displays the results in column aligned format (not comma delimited like in the previous file). This can be changed if required.
You can use the Query Options dialog box to change various options for when using the Results to File method.
-
Launch the Query Options Dialog Box
Open a new query window, and click the Query Options icon in the toolbar.
-
Configure the Desired Options
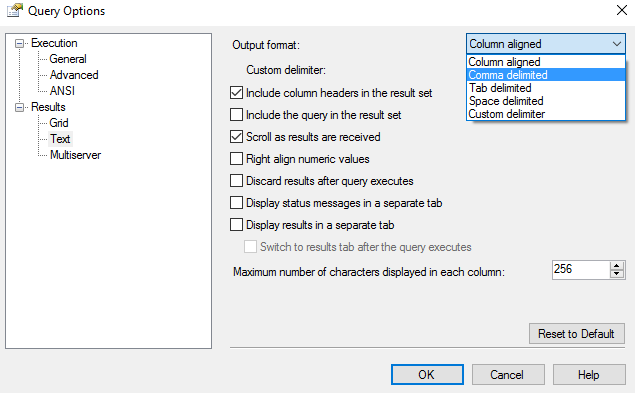
Select Results > Text and review/change any options you need to change.
For example, you could change the output format to be comma delimited instead of column aligned. You can also specify whether or not to include headers.
Once configured, click OK.
Results to Text
You can also use Results to Text for outputting the results.
This can be handy when configuring the query formatting options for Results to File (as it uses the same query options). This will enable you to check the formatting without having to open an external file.
To switch to Results to Text, click the Results to Text icon in the toolbar. You can toggle between output options whenever you need.