SQL Server 2016: Create a Table
Create a new database table using the SQL Server Management Studio GUI.
In SQL Server, you can create a new database table either via the SQL Server Management Studio graphical user interface (GUI), or by running an SQL script.
Create a Table using the GUI
Here, we will create a database table using the GUI method.
-
Create a New Table
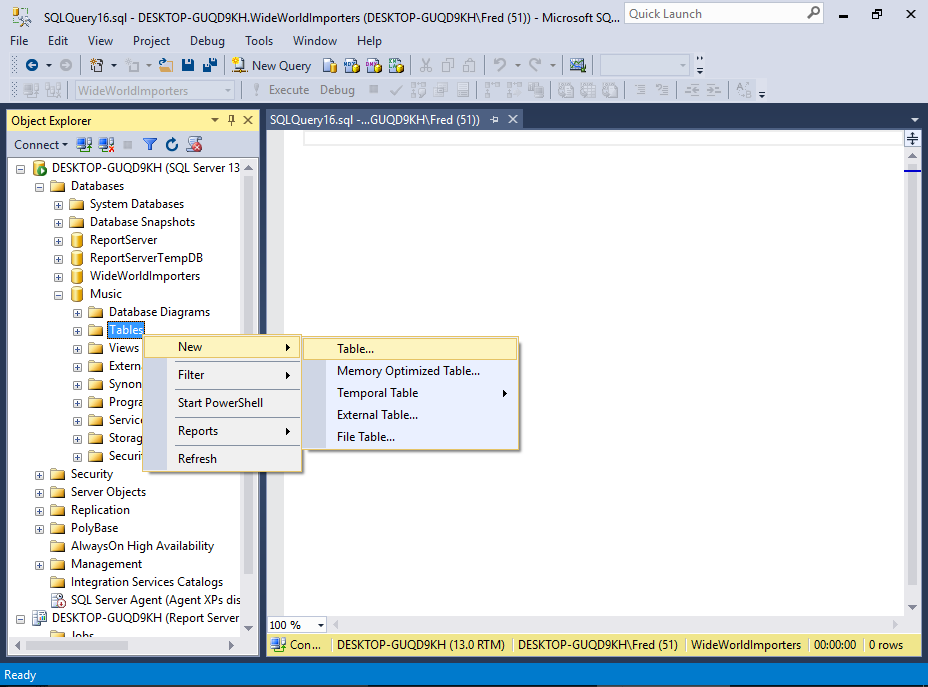
Ensure that the correct database is expanded in the Object Explorer. In our example, we'll expand the Music database.
Right-click on Tables and select New > Table... from the contextual menu.
-
Add Columns
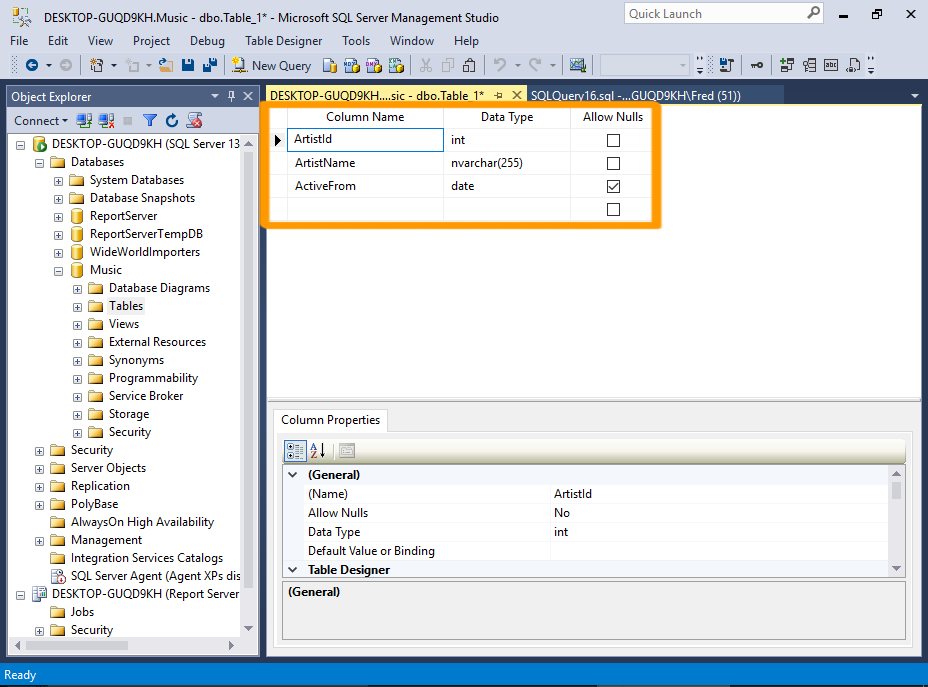
Add the columns that need to go into the table. Also specify the data type for each column, as well as any other properties that you need to.
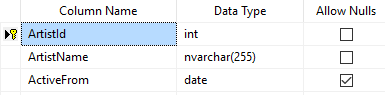
For this tutorial, we'll add the following columns/data types:
Field Name Data Type Allow Nulls ArtistId int No ArtistName nvarchar(255) No ActiveFrom Date Yes -
Set an Identity Column
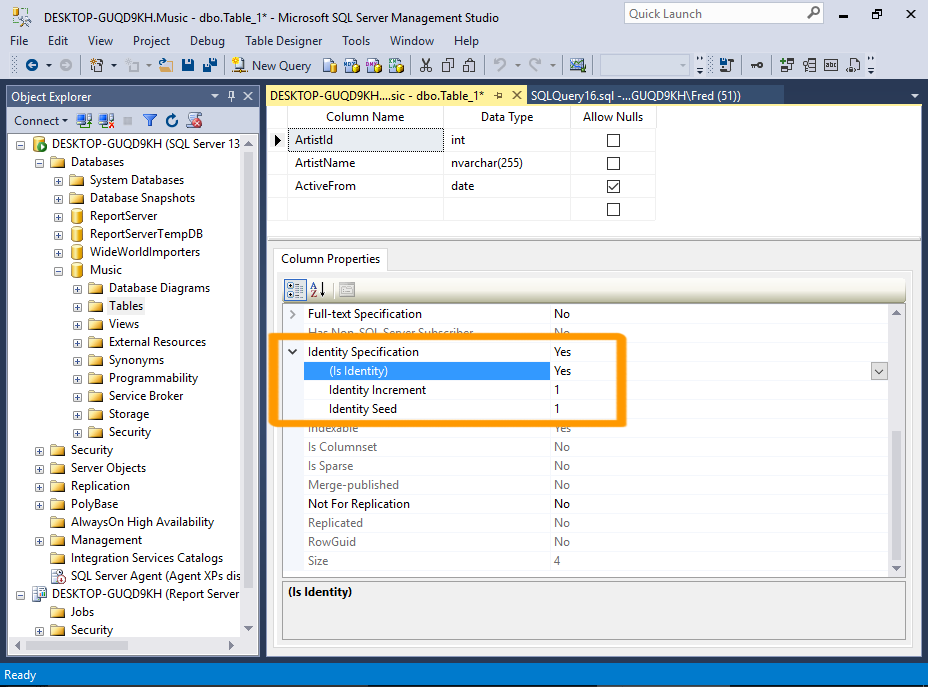
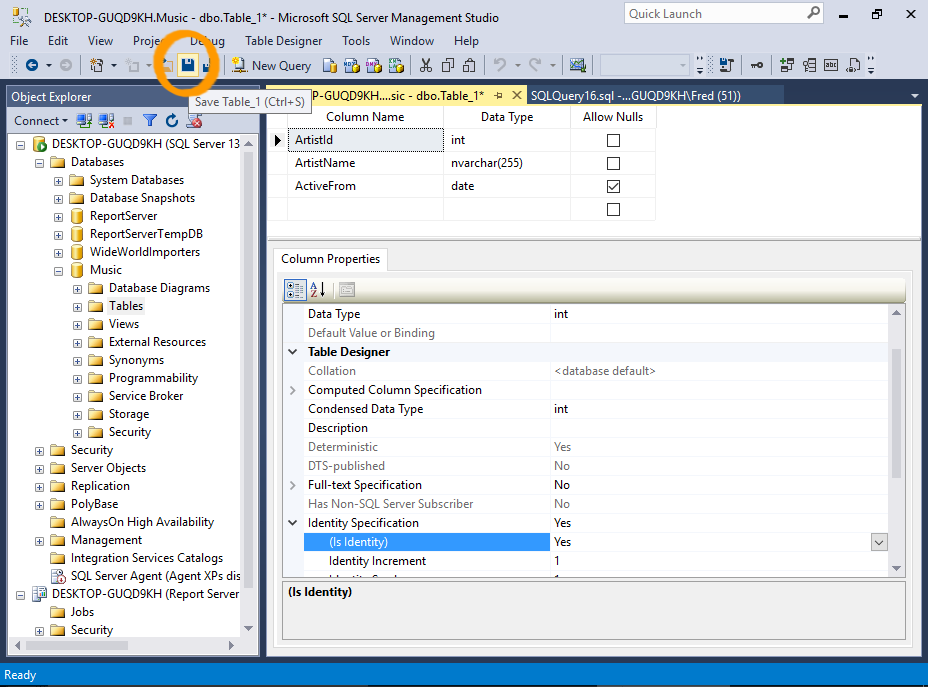
We'll now set the ArtistId column to be an identity column. This will make it an auto-incrementing value, so that the user doesn't have to insert this value.
In the top pane, click somewhere in the ArtistId field.
Now, in the bottom pane, scroll down until you see Identity Specification. Expand it, and change (Is Identity) to Yes using the drop-down list.
Leave the other identity properties as they are.
You can increase the height of the bottom Properties pane by clicking and dragging the top edge upwards.
-
Set a Primary Key
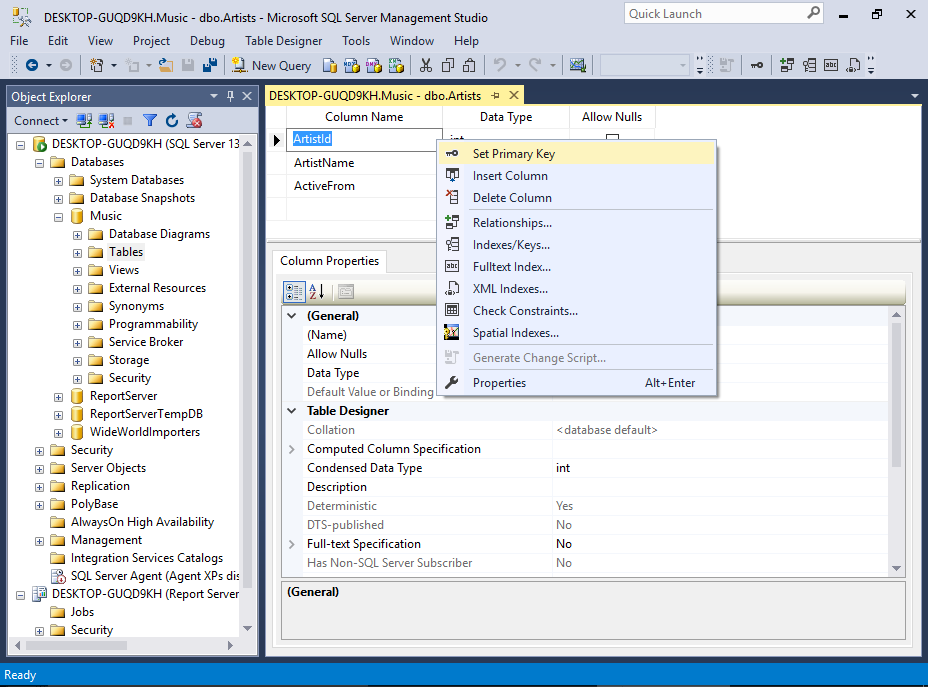
We'll also set the ArtistId column to be the primary key for this table. This will be important for when we set up a relationship between this table and another.
In the top pane, right-click in the ArtistId field and select Primary Key from the contextual menu.
Once done, you will see a little key icon next to the ArtistId column.
-
Save the Table
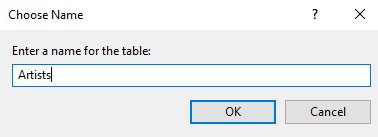
Save the table by clicking on the Save icon in the toolbar.
For this tutorial, we'll call the table Artists.
Alternatively, you can save the table by using the File menu, pressing Ctrl+S on your keyboard, or simply clicking on the X to close the table's tab. All of these will prompt you to save the table.
Check that the Table was Created
When you first open the Tables node in the Object Browser, your initial response might be that the table wasn't even created. Your table is nowhere to be seen!
But relax... all you need to do is refresh the Object Browser.
-
Refresh the Tables Node

Ensure that the correct database is open.
Right-click on the Tables node and select Refresh from the contextual menu.
-
Your New Table
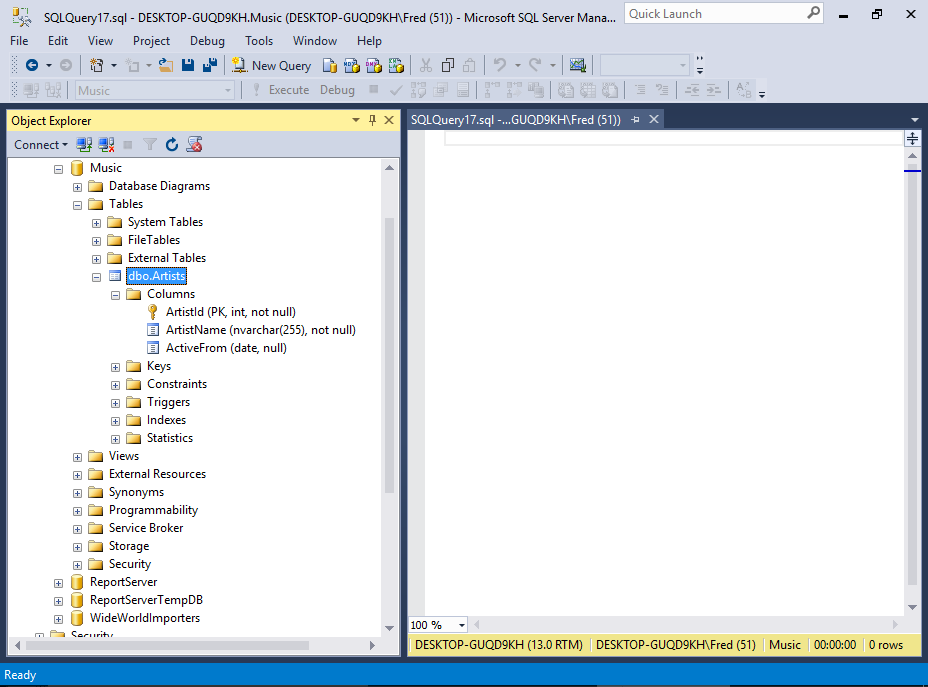
Your new table will now appear.
Expand the node and check out the columns and their data types.