Create an Animated GIF using Script-Fu
This page explains how to create an animated GIF using the Script-Fu option of GIMP. We will take a JPEG image, and convert it to an animated GIF, applying a "rippling" effect in the process.
Before/After
First, let's look at the "before" and "after" images.
-
Before
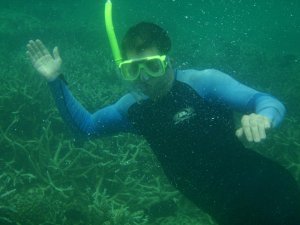
We will start with this photo in JPEG format.
We'll then take that photo and add a "rippling" effect, then create an animated GIF.
-
After
Here is the finished animated GIF.
It took about 5 minutes to convert the above JPEG image into this animated GIF using GIMP.
While most browsers support animated GIFs, some don't. If you can't see the animation in this example, your browser may not support animated GIFs.
How to Create an Animated GIF
I created the above animated GIF using the Script-Fu option of the GIMP. This is the easiest way of creating animated GIFs using GIMP. Script-Fu is a scripting extension for the GIMP.
To create an animated GIF using Script-Fu:
-
Open the Image
Open an image that you'd like to turn into an animated GIF.
-
Select an Animation Effect
From the Script-Fu menu, select an effect from the Animators option (I've chosen Rippling here).
Update
GIMP now has animations at Filters > Animations.
-
Set the Parameters
Set the parameters as required (you can experiment with these settings as much as you wish).
Once done, click OK.
-
Launch Preview
At this stage, a copy of your image will have opened in a new (untitled) window. It will have as many layers as frames that you selected at the previous step.
To preview your animated GIF, select Filters > Animation > Playback.
-
Play the Animation
Now a copy of your image will have opened in another window. But this time it's the Animation Playback window.
Click Play/Stop or step through the animation as required.
-
Export Image
Once you're happy with the animation, export the image (File > Export) and select GIF image (*.gif).
If you're not happy, go back and try again.
-
Export the Animation
When prompted, select As Animation, then Export.
These screenshots use an older version of GIMP, and these dialogs came from the Save As option.
With later GIMP versions, you simply export instead of save. When doing this, both of these dialogs are combined into one.
That's all it takes to create an animated GIF using the GIMP!
In this tutorial we used the "ripple" effect, but feel free to check out the other animation effects. Also, experiment around with the various settings of the different effects.