How to Restore a .bak File using Azure Data Studio
Step by step tutorial for restoring a SQL Server .bak file using Azure Data Studio.
Azure Data Studio (formerly called SQL Operations Studio) enables us to restore a database by pointing and clicking our way through the dialog boxes. It works just like restoring a database using SQL Server Management Studio.
Below are step by step instructions for restoring a database using Azure Data Studio. This assumes that SQL Server is running and you're connected to it via Azure Data Studio.
-
Initiate the Restore Process
Click the
Restorebutton on the Server Dashboard.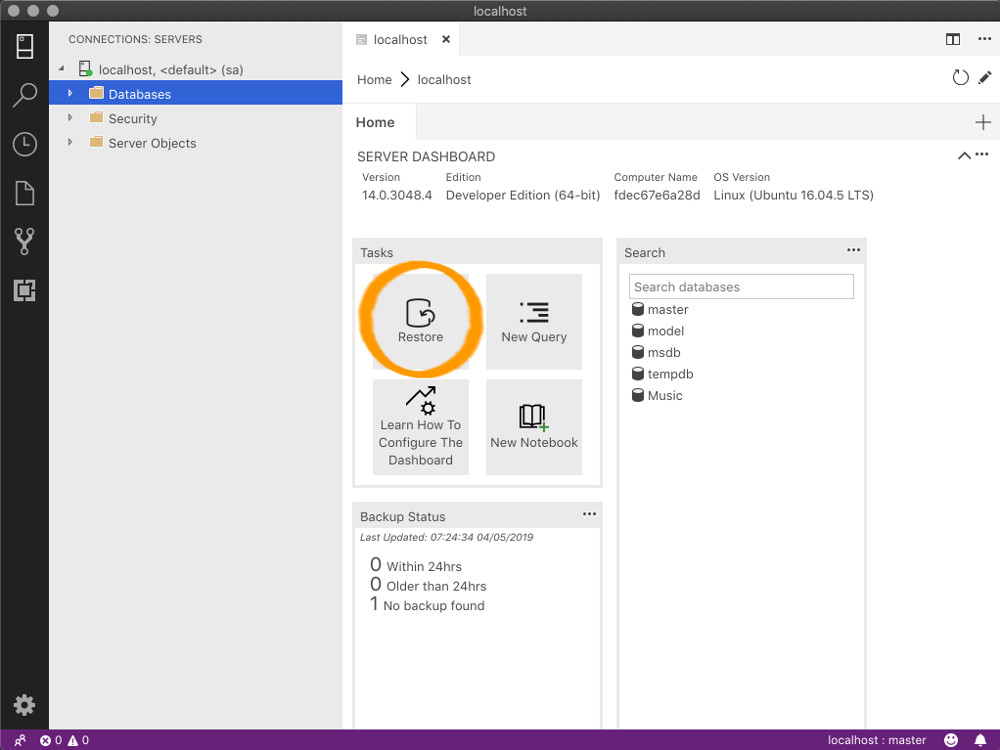
-
Select the Source
Select
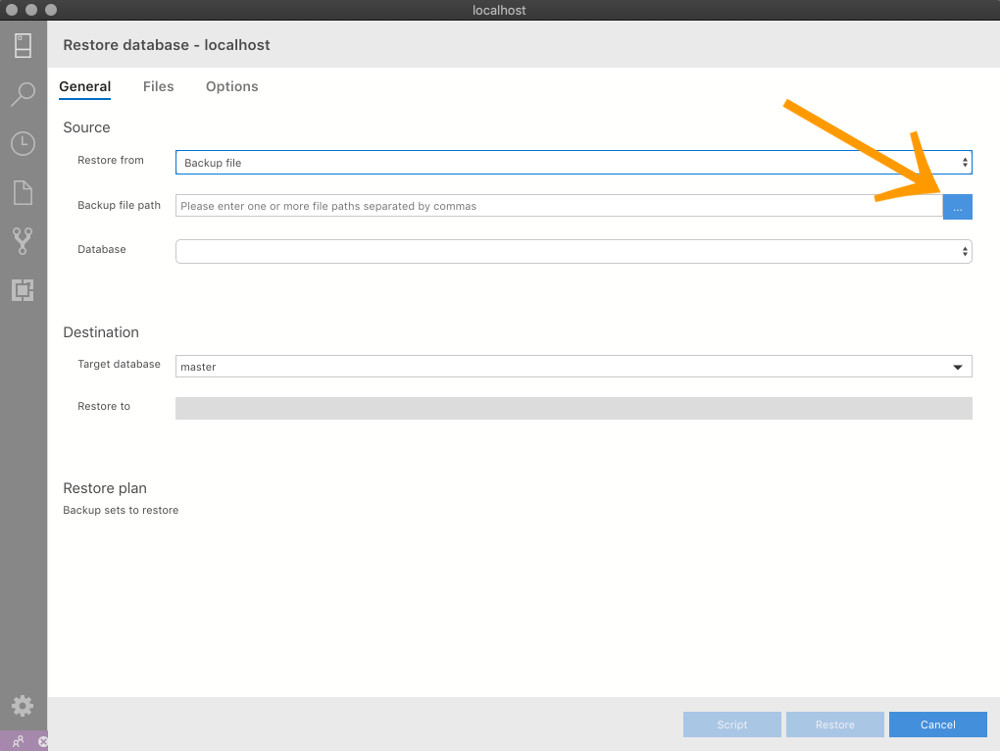
Backup filefrom the first dropdown menu.Then click the ellipsis (
...) to open the file explorer.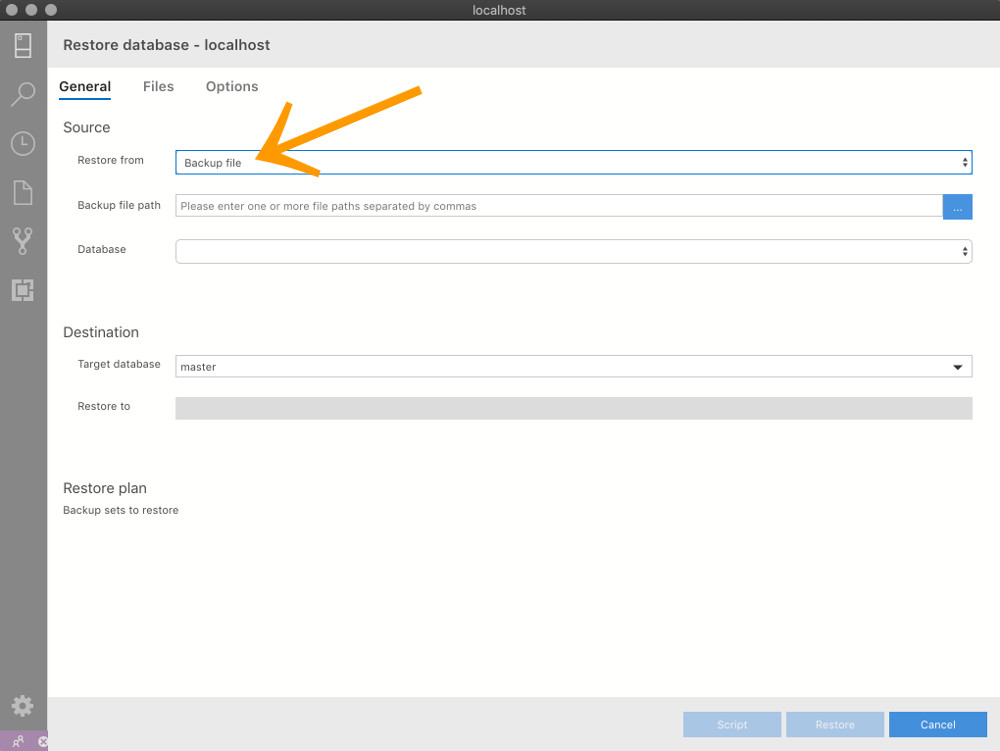
-
Select the .bak File
Navigate to the .bak file, select it, then click
OK.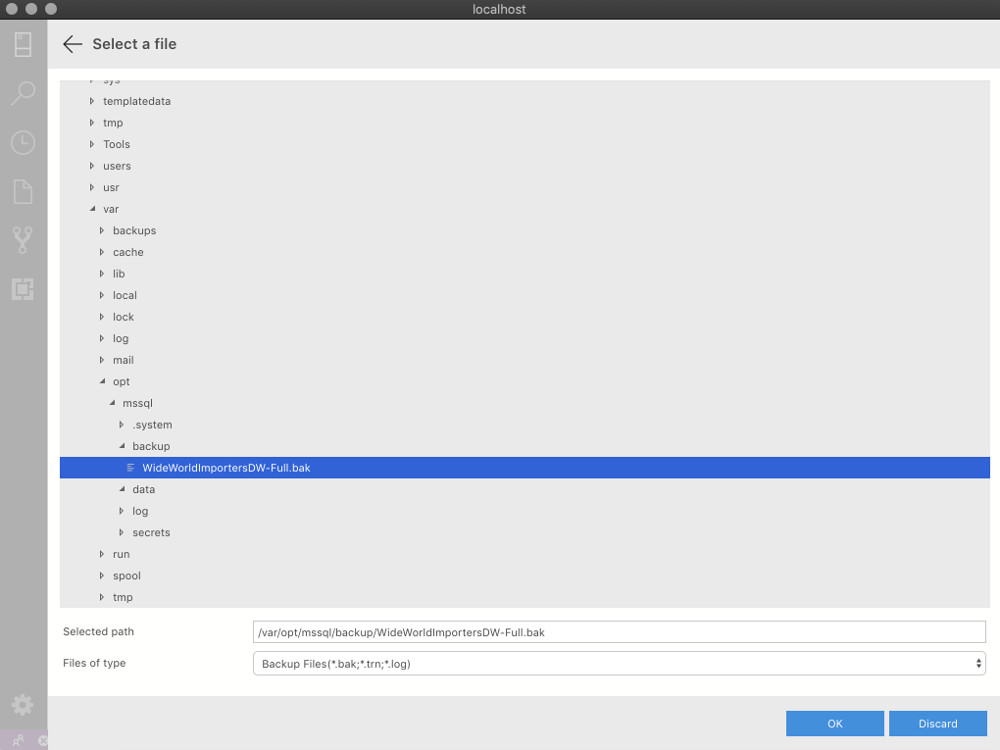
-
Restore
Click
Restoreto start the restore.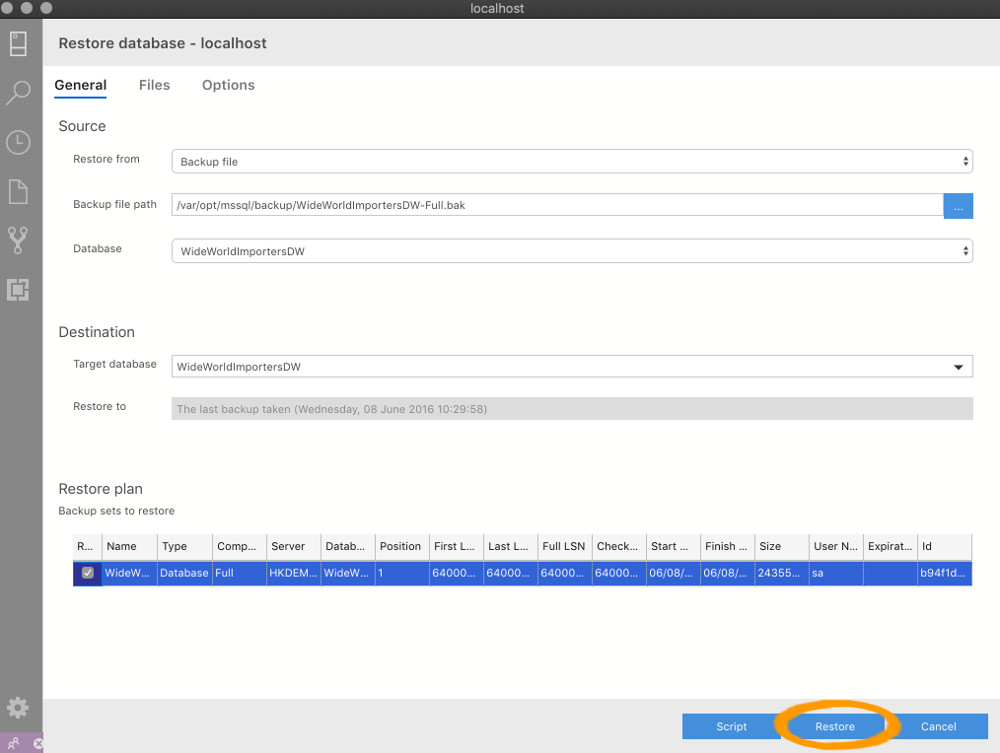
-
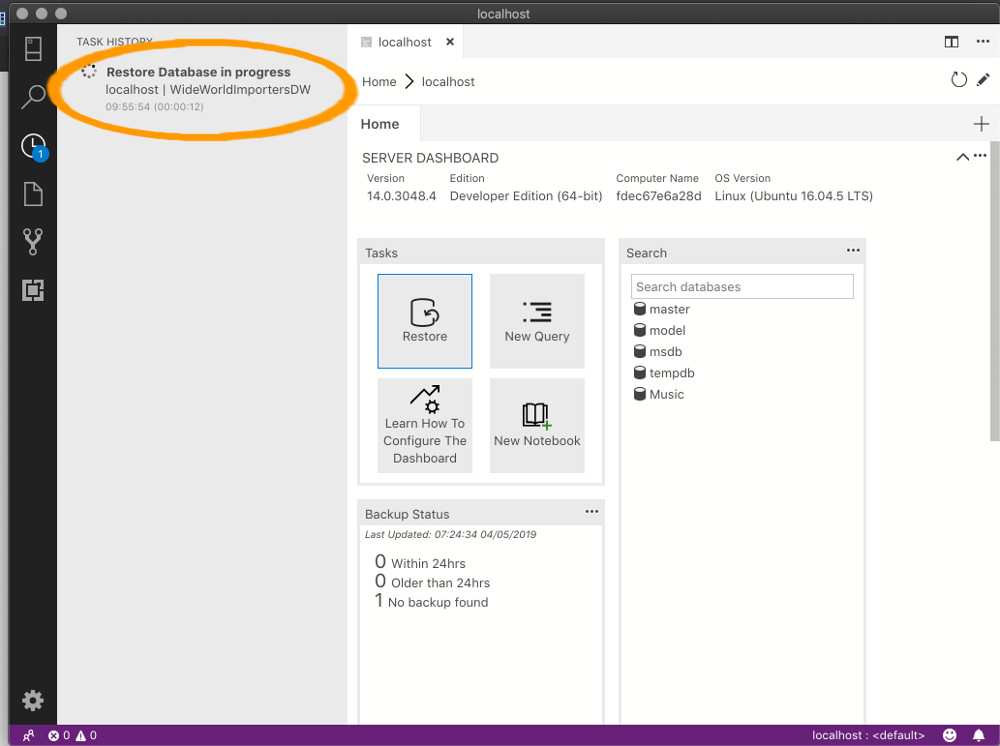
Wait...
Watch the Task History bar for the restore to complete. Should only take a minute or two.
-
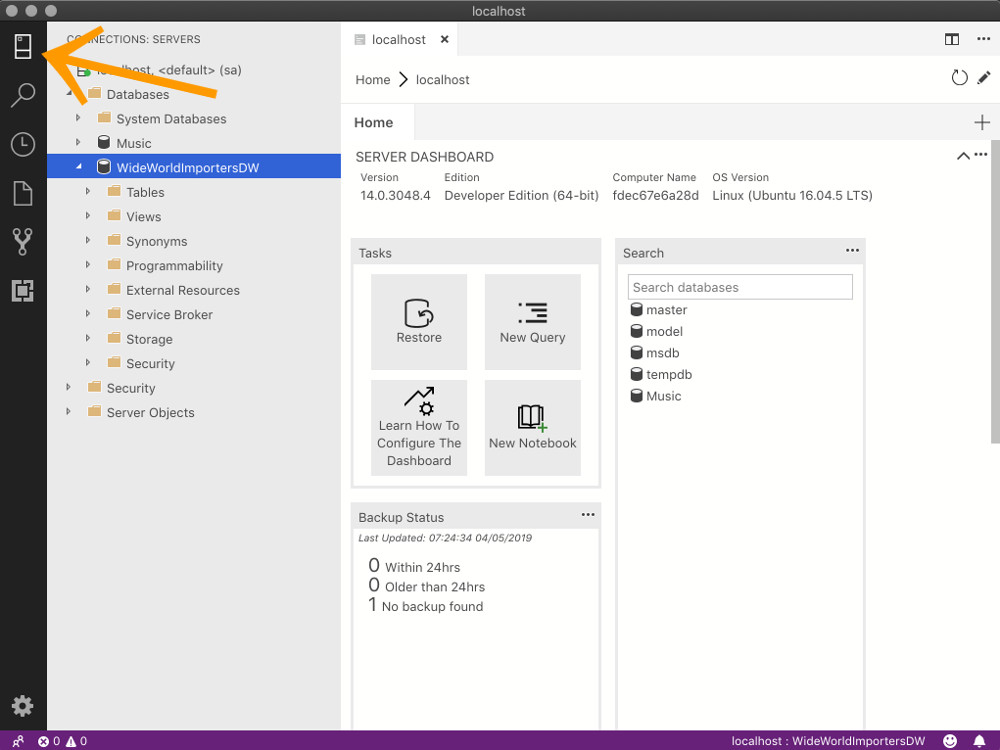
Finished - View the Database
Once the restore is complete, click the Servers icon at the top left of Azure Data Studio's interface. Your new database should appear in the list of databases (you might need to refresh the list by right-clicking on Databases and selecting Refresh).
-
Check the Database
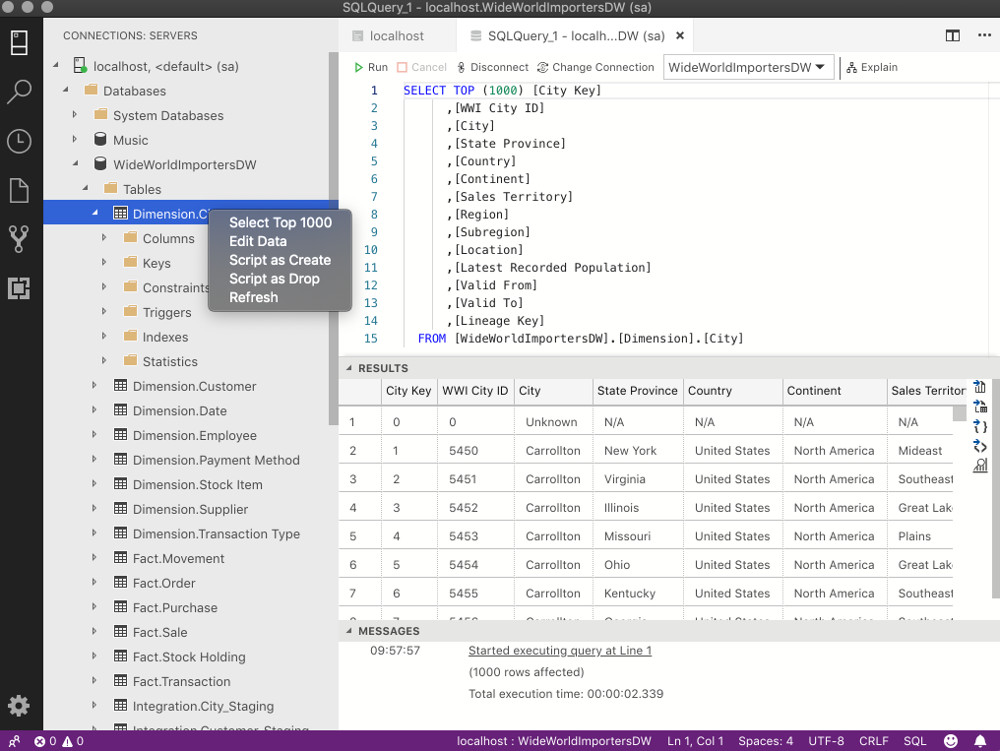
Run a quick test. For example, right-click on a table and select Select Top 1000.
Do any other tests as required.
