Restore a Database in SQL Server 2017
Here, I'll demonstrate how to restore a database using SQLOPS (now called Azure Data Studio).
You can restore a SQL Server database by using Transact-SQL, PowerShell, or via a GUI such as Azure Data Studio or SSMS. In this example, we're going to restore a backup of a brand new database called WideWorldImportersDW.
The WideWorldImporters database is a sample database provided by Microsoft's SQL Server Team to demonstrate how SQL Server's features can be used in a real-world scenario. In our example, we'll restore the WideWorldImportersDW database, which is a data warehouse version of the WideWorldImporters database.
This process will create a new database called WideWorldImportersDW. The database will contain various objects (such as tables, views, stored procedures, etc). The database will also contain sample data, so you can start creating queries as soon as it has been restored.
Download the Database Backup File
Before you start, go to this GitHub page and download the .bak file.
- Download the WideWorldImportersDW-Full.bak file if you're using the Evaluation, Developer, or the Enterprise Edition of SQL Server.
- Or download the WideWorldImportersDW-Standard.bak file if you're using SQL Server Standard Edition.
Restore a Database via the SQLOPS/Azure Data Studio GUI
-
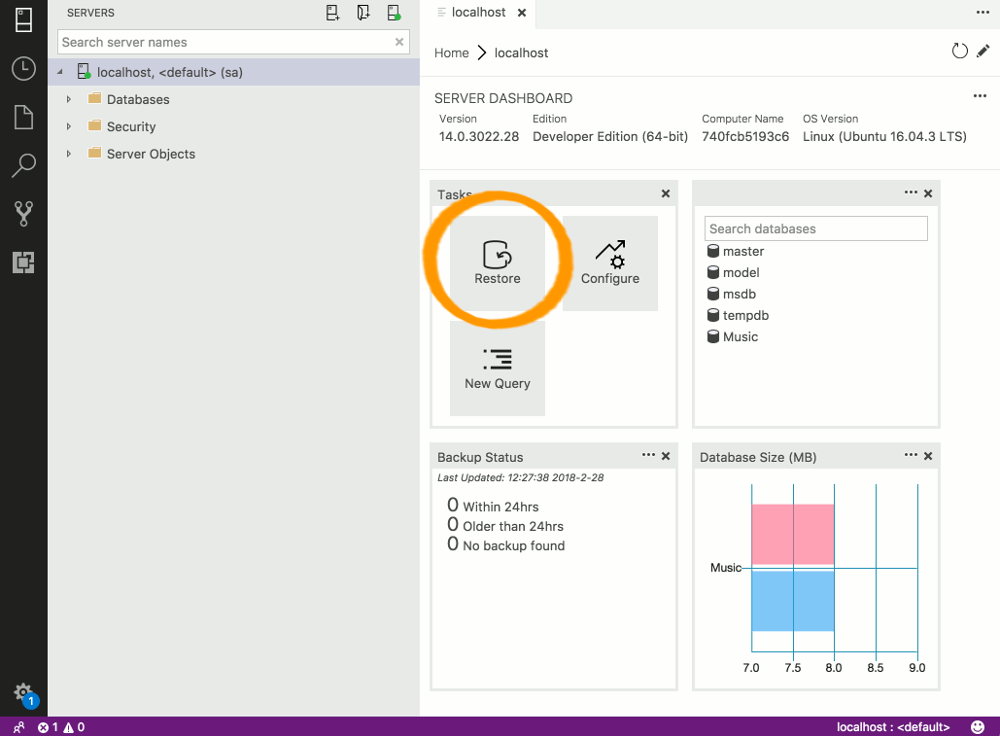
Open the Server Dashboard
In the left pane of Azure Data Studio, right-click the server name and select Manage.

-
Start the Restore Process
Click the Restore button.
-
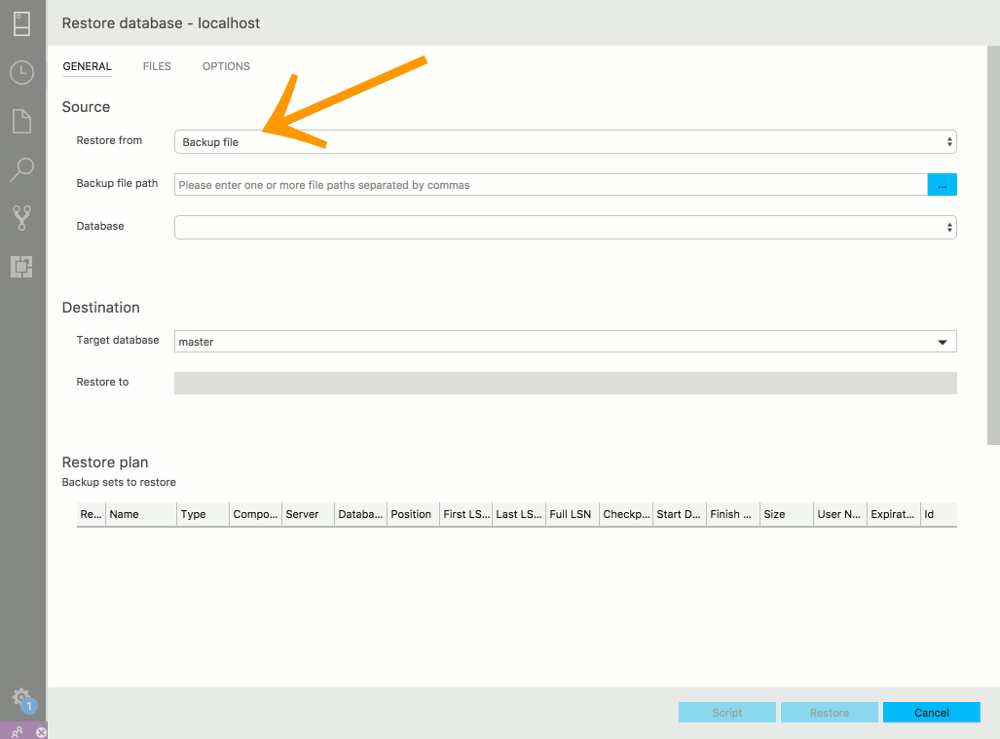
Select a Restore from Option
Select Backup file from the Restore from option.
-
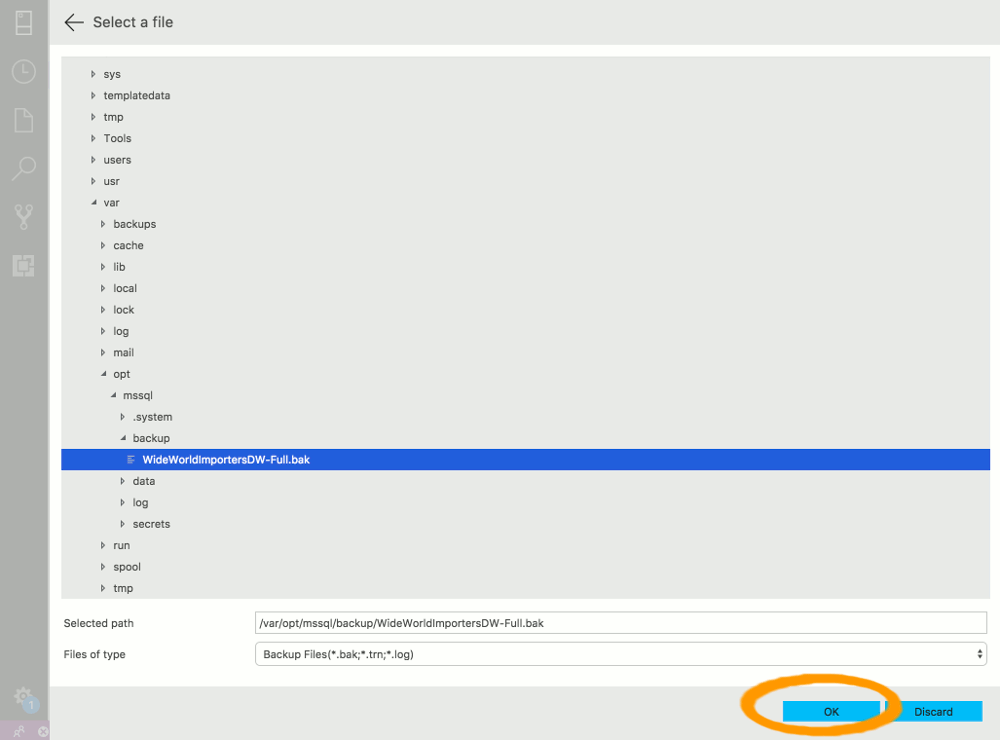
Select the Backup File
Navigate to the backup file, select it, then click OK.
-
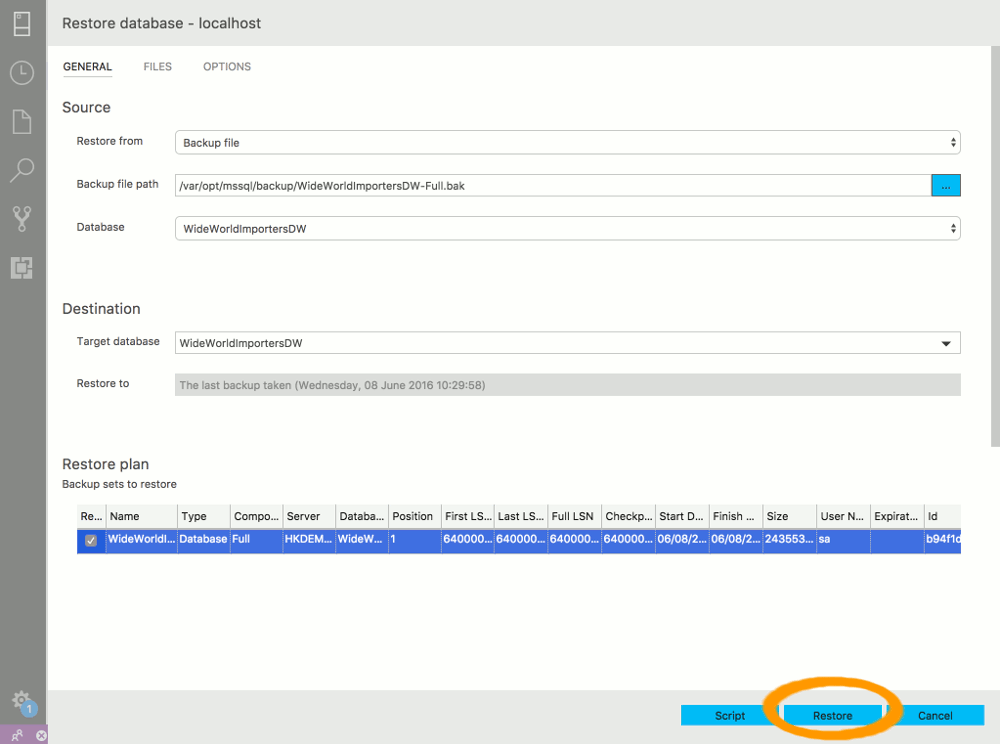
Review the Settings
This dialog box displays the details of the backup file that will be restored. If you have specific requirements, you can adjust certain settings using the FILES and OPTIONS at the top.
For our example, leave it at the default settings and click Restore to restore the backup.
-
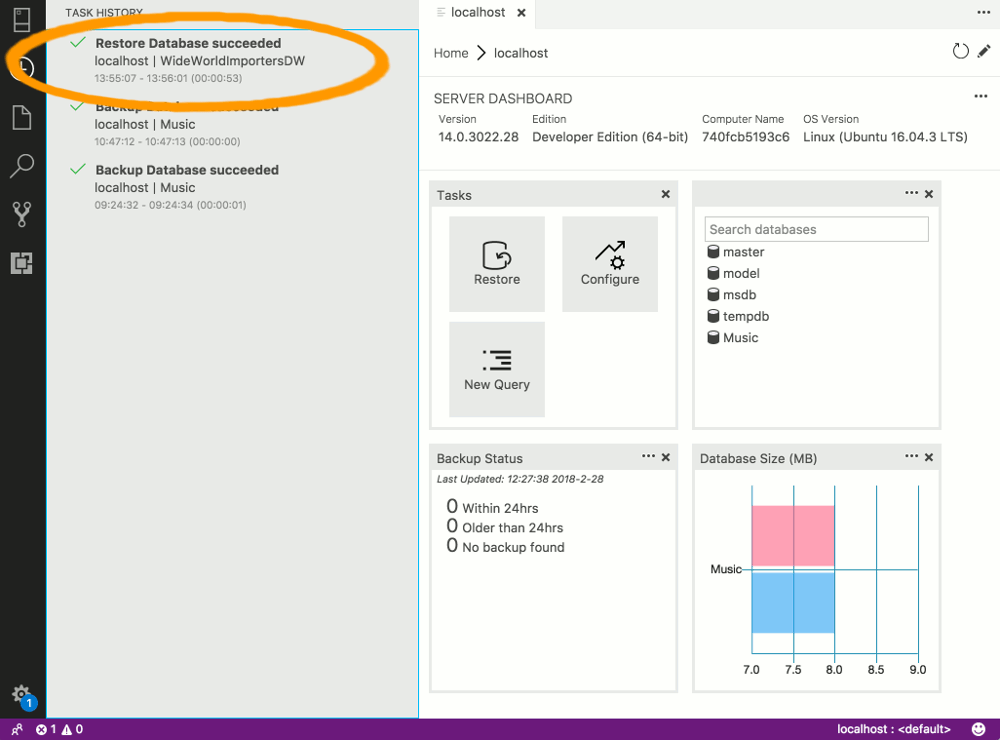
Restore Complete
Once the restore is complete, a message is displayed confirming that the restore succeeded.
-
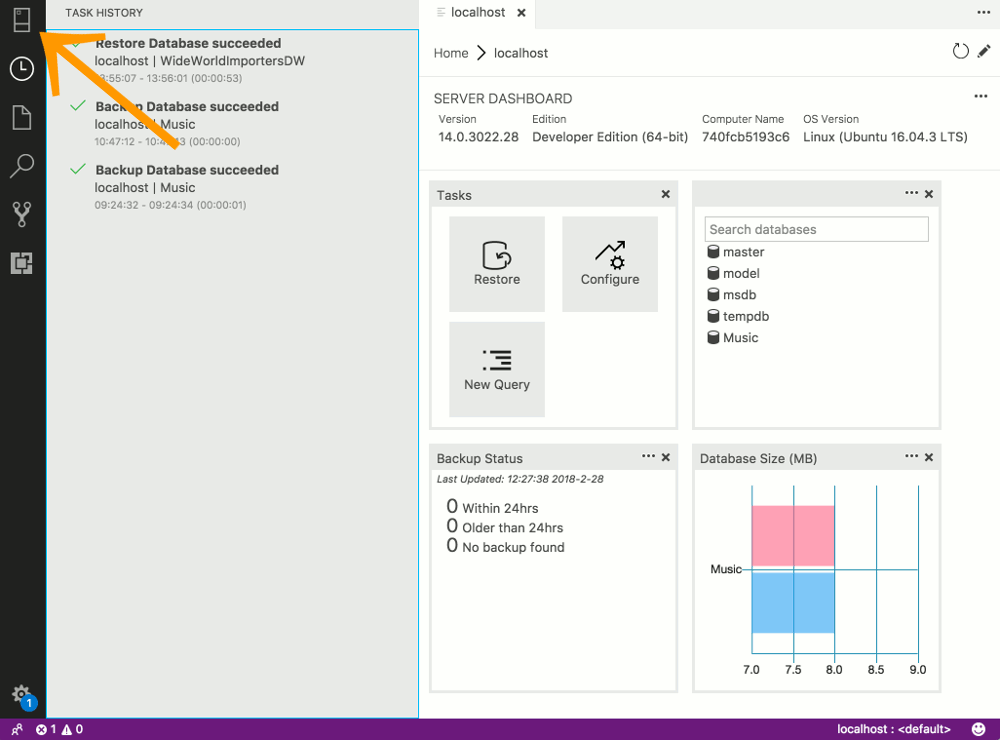
Navigate to the Database
Click the Servers icon in the top-left so that you can navigate to the database.
-
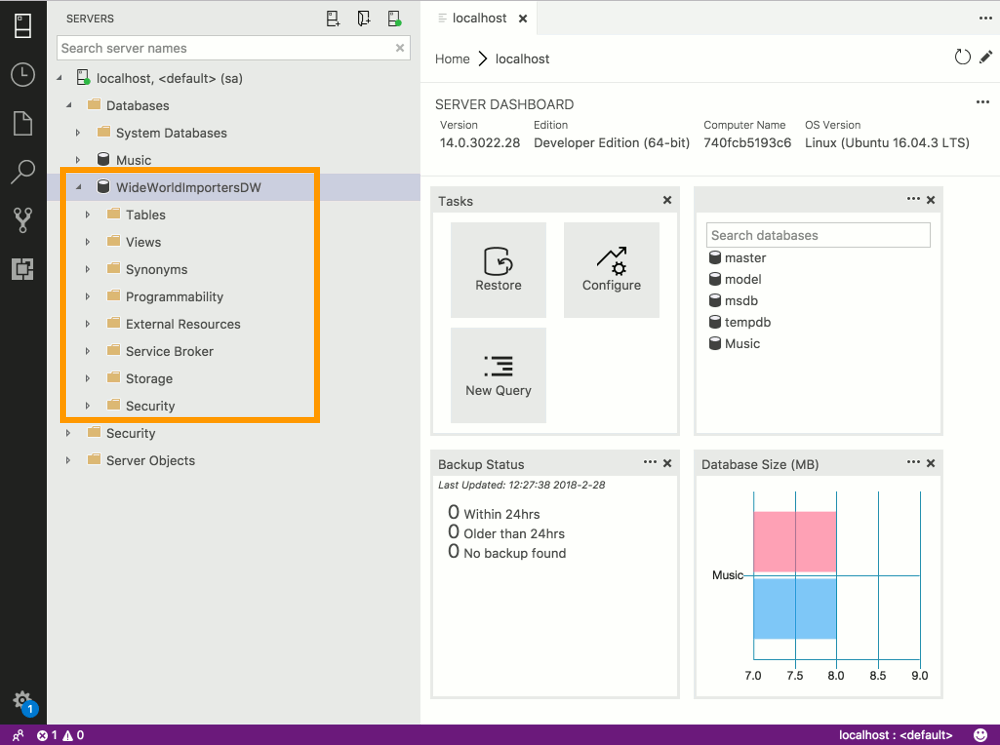
View the Database
Expand the Databases node to reveal your newly restored database.