Create a Table in Microsoft Access 2013
With database management systems, you need to create your tables before you can enter data. Microsoft Access makes creating tables extremely easy. In fact, when you create a database, Access creates your first table for you (and calls it Table1).
Normally when you need to create a new table, you'll select CREATE > Table from the Ribbon toolbar. But we can do that later.
For now Access has already created our first table, so all we need to do is modify that table so that it suits our needs.
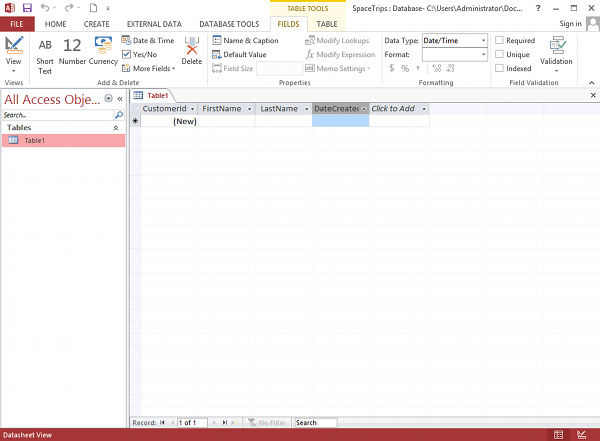
Using our blank database, we are going to rename Table1 to Customers. This table will have 4 columns: CustomerId, FirstName, LastName, and DateCreated.
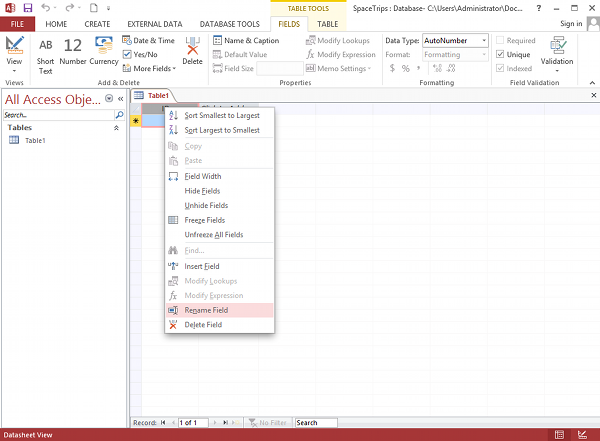
- Rename the ID field to CustomerId. To do this, Right-click on the ID column and select Rename Field. Enter CustomerId when prompted:
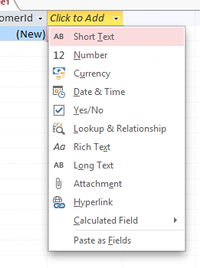
- On the next field, click on Click to Add (unless Access has already opened the menu for you) and select Short Text:
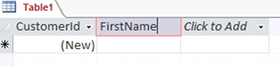
- At this point, Access will conveniently highlight/select the field name (currently Field1) so that you can name the field. Call it FirstName:
- Do the same again for the next field (LastName) and select data type Short Text.
- In the next field, select the Date & Time data type and name the field DateCreated
What we just did was create the column names and specify the type of data that can be entered into them. Restricting the data type for each column is very important and helps maintain data integrity. It can ensure that the user enters the data in the intended format. It can also guard against accidents like for example, inadvertently entering an email address into a field for storing the current date.
Your database table should now look like this:
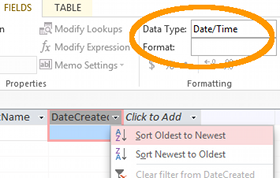
You might notice that now when you click on the field names, you can't see or change their data types. Instead, if you click on the inverted triangle within a field, you see a different menu of options (eg, Sort Oldest to Newest etc) depending on the field's data type. This shows that the field is ready for data - once you have data, you can sort it using this menu.
Don't worry if you accidentally entered the wrong data type. You can change the dataype in the Ribbon toolbar by adjusting the data type under the Data Type dropdown (top right area of the toolbar). If you can't see this option in the toolbar be sure to select the FIELDS tab first:
We have just created a database table. We did this in Datasheet view. Next we will see how it appears in Design view.
There's also a tutorial for Access 2016.