Python Environment Setup
Here are some options to think about when setting up your Python environment.
Python enables you to start coding as soon as you've installed it. This makes it easy for beginners to start learning Python without having to learn how to configure a development environment first.
Included with Python
The default installation of Python includes the Python interpreter, and its own Integrated Development Environment (IDE) called IDLE. These allow you to start programming as soon as Python has been installed.
-
Python Interpreter
The Python interpreter translates the high-level language (i.e. Python) into a low-level language that the machine can understand. In other words, it reads Python programs and carries out their instructions.
So you can enter Python code straight into your terminal/command prompt, and the interpreter will interpreted the code. Any results will be displayed within the terminal.
- Open your computer's terminal or command prompt
- Enter
python3(or justpythonif that doesn't work) - Enter
print("Hello World")
The interpreter will output Hello World as requested.
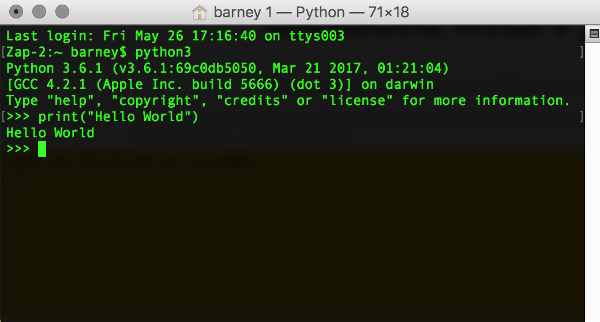
Screenshot of the Python interpreter running in the Mac's terminal.
-
IDLE
Python's default installation also comes with its own IDE called IDLE. IDLE initially stood for Integrated DeveLopment Environment, but this is sometimes extended to Integrated Development and Learning Environment. IDLE is intended to be a simple IDE, which is suitable for beginners learning Python. It includes common IDE features such as auto completion, smart indent, syntax highlighting, debugging, etc. IDLE itself is built 100% in Python (using the
tkinterGUI toolkit).IDLE can be launched by typing
idleoridle3(or its full path if it hasn't been added to your PATH). It can also be launched by navigating to it and double-clicking on it via your file system's GUI.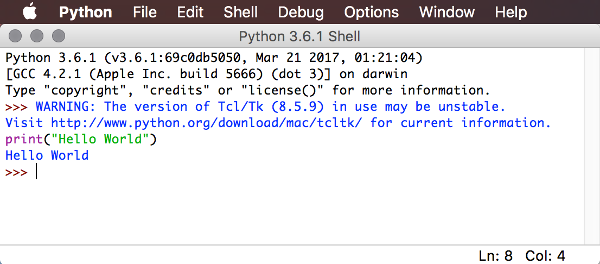
Screenshot of IDLE running on the Mac.
If you're just starting out with Python, you can continue this tutorial using Python's default installation. You can enter code directly into the terminal/command prompt, or you can use IDLE. No need to install any extra software.
In other words, you're good to go!
But before we move on, let's take a quick look at some of the IDLE alternatives.
Third Party Code Editors and IDEs
As handy as IDLE can be for getting up and running quickly, most Python developers use a third party editor or IDE. These tools typically include basic features such as auto code completion, integrated debugging, smart indent, etc, but they can also include other useful features such as source control integration, split views, line numbering, code folding, code templates, unit testing, and more.
Python IDEs
Some editors and IDEs are built specifically for Python development (but may also support other technologies such as HTML, CSS, JavaScript, etc). Examples of Python IDEs include PyScripter, PyCharm, PyDev (for Eclipse), and Komodo .
Other Code Editors and IDEs
Many other code editors and IDEs include Python support too. If you have a favorite code editor, chances are, you can continue to use it for your Python programming. In some cases you might need to install an extension for a specific purpose, such as debugging or syntax highlighting, but this is an easier route than downloading, installing, and learning a whole new IDE.
Examples of code editors and IDEs that can be used for Python development include Sublime Text, Visual Studio Code, Atom, Vim, Emacs, and Apple's Xcode.
Visual Studio Code
Here's an example of what Visual Studio Code looks like when running some Python code. VS Code is a free, open source code editor from Microsoft. It can be run on Windows, Mac, and Linux. It comes with built-in support for JavaScript, TypeScript and Node.js and there are many extensions available for other languages (including Python of course).
Installing extensions is easy with VS Code. In fact, it often recommends extensions based on the context of what you're doing. For example, as soon as you save a file with a .py extension (indicating that it's a Python file), a message will pop up asking if you want to install a Python extension. If you do, you will see a list of available extensions. Clicking install immediately installs your chosen extension.
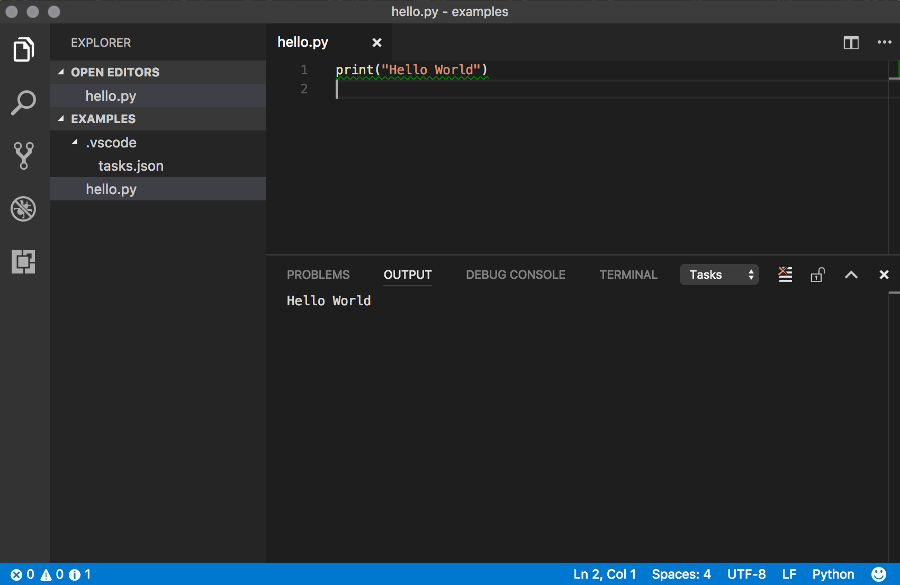
Screenshot of VS Code running Python. The bottom pane displays the output from the code in the top pane.
Configuring your Editor
In some cases you will need to perform some extra steps to get your editor working well with Python. For example, you might need to specify the path to the version of Python that you're using. Or you might want to configure a task runner to have the results of your Python program output to an output window.
Here's how you can do these two tasks using VS Code.
Set the Path to Python
You'll probably only need to do this step if you have multiple versions of Python running on your machine. By default, VS Code sets the path to python. If you only have one Python installation, this will work fine. But if you have multiple installations, you might find that it points to the wrong one.
Here's how to change it.
-
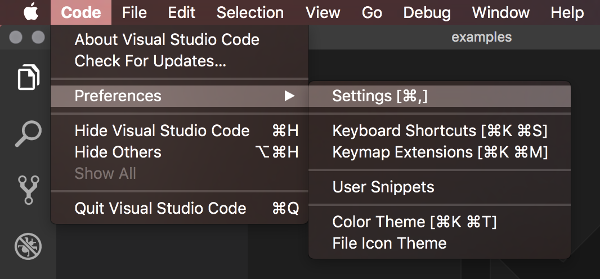
Open your Settings
Open VS Code and from the top menu, select Code > Preferences > Settings
The default settings open in the left pane, while the "User Settings" open in the right pane. You can add settings to the User Settings file and it will override the corresponding setting from the default settings.
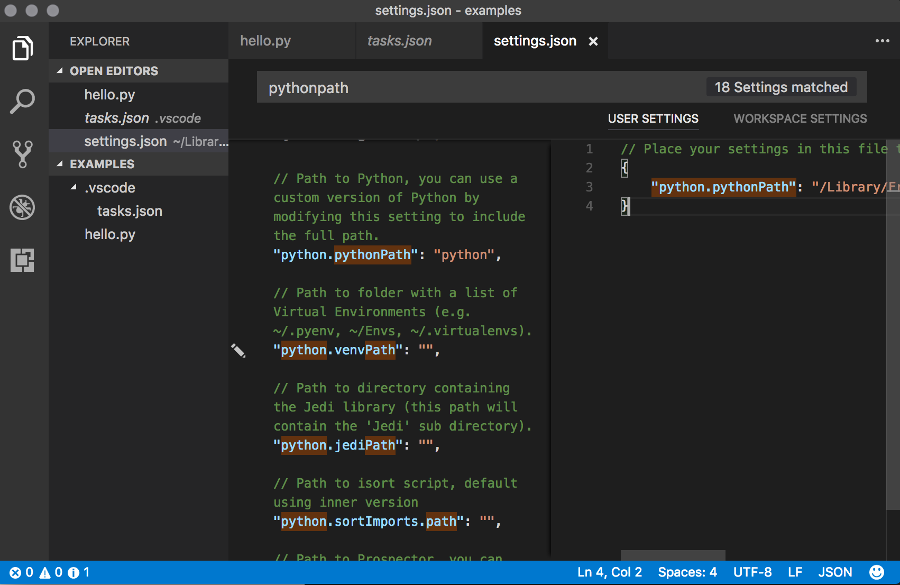
Screenshot of adding a user setting in VS Code. The user settings in the file in the right pane, override the default settings in the left pane.
-
Enter the Path
In this case, we will enter the full path to Python. Add
"python.pythonPath":followed by the path to Python in double quotes. Here's an example:Note the curly braces. This is a JSON object. If there are multiple name/value pairs within the object (i.e. for other settings) they must be separated by a comma.
-
Save the Settings
Save the User Settings file by going File > Save (or using the usual keyboard shortcut).
Configure a Task Runner
Here, we'll configure a task runner to output the results of our Python code.
-
Open/create the
tasks.jsonFile- Select View > Command Palette... from the top menu, and enter tasks into the command palette that appears.
- Click Tasks: Configure Task Runner
- If another menu pops up asking you to select a task runner, select Others
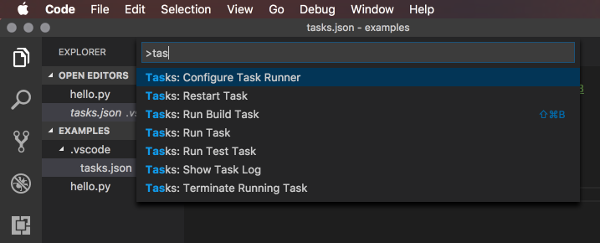
Screenshot of the "Configure Task Runner" option in VS Code.
-
Edit the
tasks.jsonFileThe previous step results in a
tasks.jsonfile appearing in a tab.Ensure that this file has the following name/value pairs:
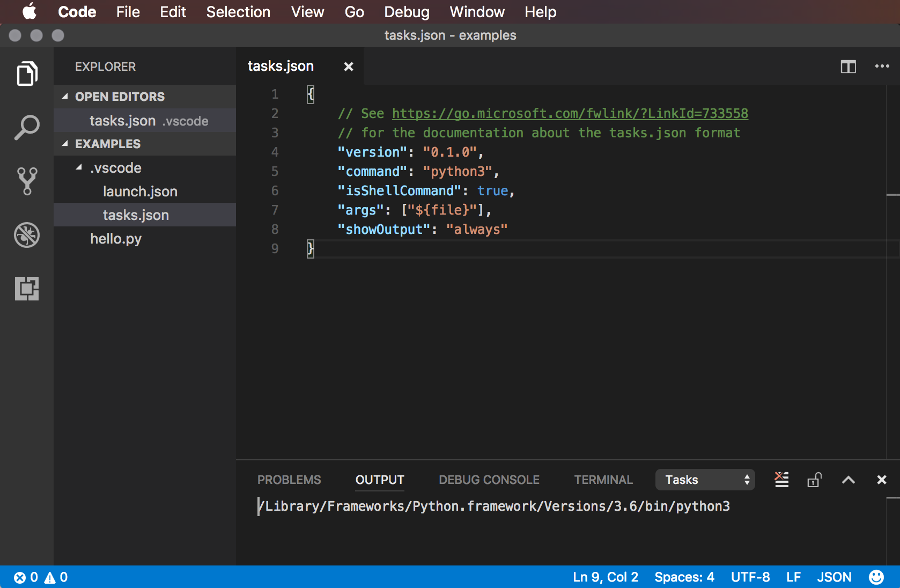
Screenshot of the "Configure Task Runner" option in VS Code.
-
Save the File
Save the file by going File > Save (or using the usual keyboard shortcut).
Virtual Environments
Many developers have multiple Python projects running at the same time. Each of these projects will probably have its own dependencies (eg, code libraries, etc). Plus, they might be built using different versions of Python.
This is where virtualenv can come in handy.
virtualenv is a tool to create isolated Python environments. These are generally referred to as virtual environments.
virtualenv creates an environment that has its own installation directories, that doesn't share libraries with other virtualenv environments. It can also be configured so that it doesn't access the globally installed libraries either.
But for the purposes of getting started with this tutorial, we won't be creating any virtual environments for now.