How to Import a SQL Server Database into Access 2016
Access 2016 provides a wizard to help you import a SQL Server database into Access.
You can import a whole SQL Server database, or part of it, into an Access database. When you import a database into Access, you effectively take a copy of the database objects and its data. Therefore, any updates you make in Access is not reflected in the original SQL Server database. You can update the data and objects and it won't impact on the source database.
If you need all data changes to be reflected in the source database, you need to create linked tables to SQL Server instead. Doing that will keep allow you to update the data in the source database. However, you won't be able to change the table definitions from Access. Any structural changes need to be done on the SQL Server end.
Below is a step-by-step guide to importing a SQL Server database into Access 2016 (and creating a new data source in the process).
-
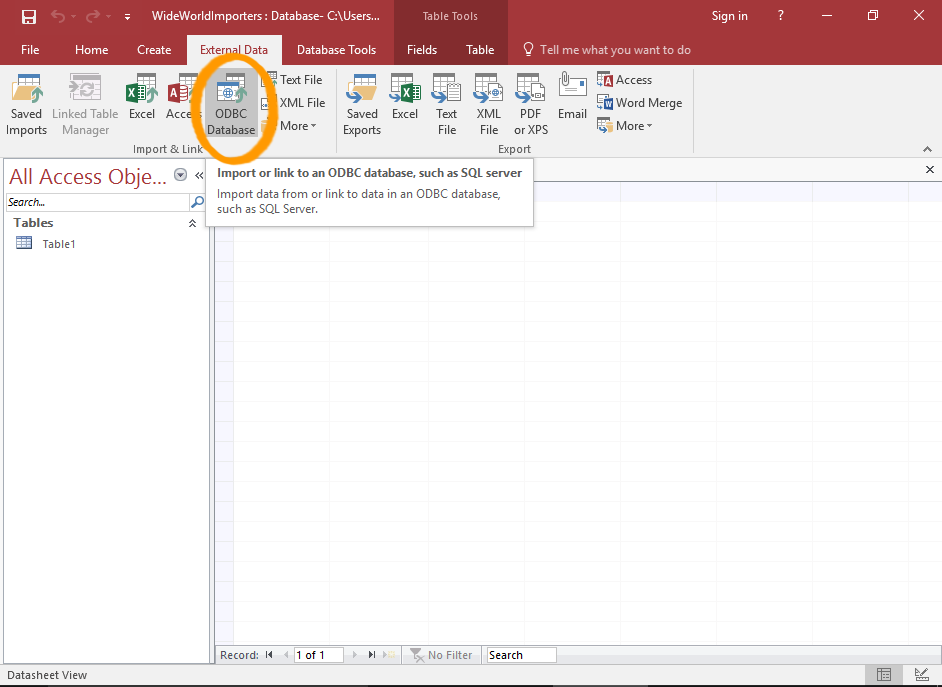
Launch the Import/Link Wizard
Click ODBC Database in the Import & Link group from the External Data tab on the Ribbon.
You can start from an existing Access database, or you can create a blank database first.
-
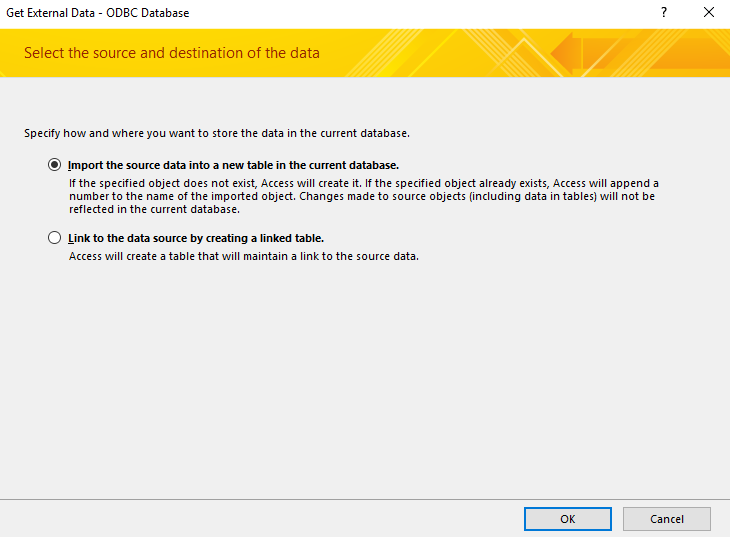
Select the "Import" Option
Select Import the source data into a new table in the current database, then click OK.
-
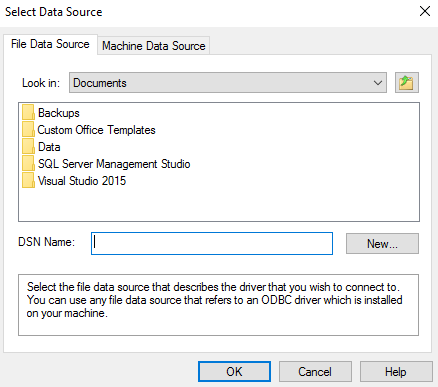
Select the Data Source
This screen is asking for a data source. You can either create a new data source, or provide the details of an existing one.
If you already have a data source for SQL Server, skip to step 12.
Otherwise, you will need to create a data source here.
For this example, we will create a new data source.
To create a data source, click New....
-

Select a Driver
Select SQL Server from the list of drivers, then click Next >.
The following steps may differ slightly, depending on the software installed on your machine.
-
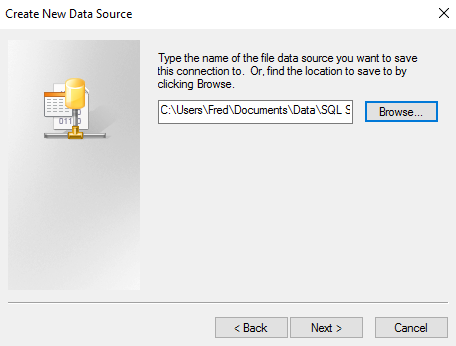
Enter the Data Source Name
Type the name of the data source you'd like to save the connection to (or browse to a location using the Browse... button), then click Next >.
-
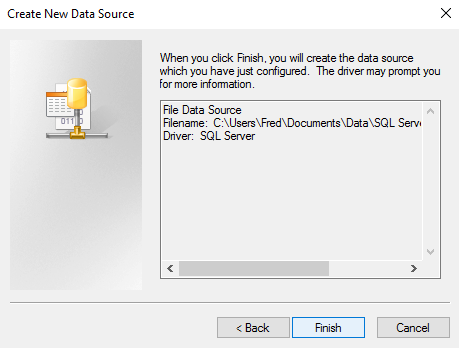
Create the Data Source you just Configured
Review the information and click Finish.
-
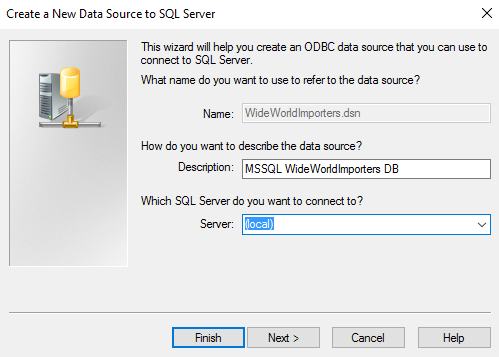
The "Create a New Data Source to SQL Server" Wizard
We still need to provide more details for our connection to SQL Server.
Provide a description for your data source, select the SQL Server that you'd like to connect to, then click Next >.
If the database is on the same server you can select (local).
-
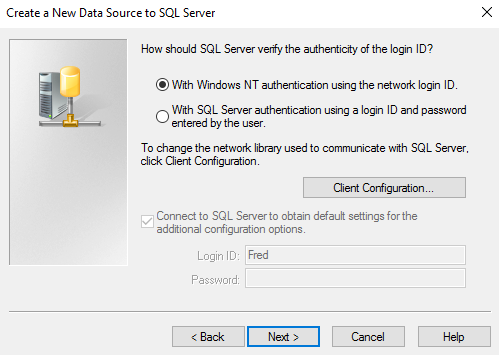
Choose an Authentication Method
Select either Windows NT authentication or SQL Server authentication, then click Next >.
Client Configuration
Click Client Configuration if you want the connection to use a network library other than the client's default network library.
Also use this option if the actual network address of the server must be specified for a successful connection. For example, when using the TCP/IP Net-Library, you might need to specify the port and socket address of the server. If a SQL Server instance is listening on an alternate named pipe, you must specify the pipe name in the advanced entry.
-
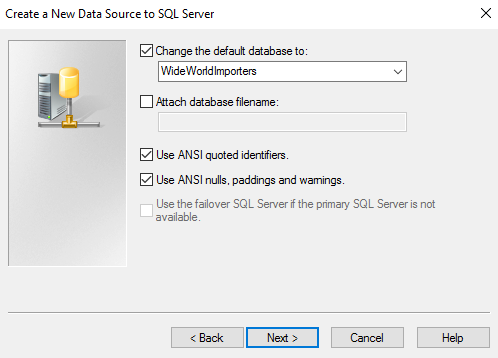
Set the Default Database
Change the default database to the actual database that contains the tables/views you want to link to.
Change any other settings if required.
Click Next >.
When ANSI quoted identifiers is selected, SQL Server enforces ANSI rules regarding quote marks. Double quotes can only be used for identifiers, such as column and table names. Character strings must be enclosed in single quotes.
Selecting ANSI nulls, paddings, and warnings specifies that the
ANSI_NULLS,ANSI_WARNINGS, andANSI_PADDINGSoptions be set on when the SQL Server driver connects.ANSI_NULLSrequires thatIS NULLorIS NOT NULLis used for all NULL comparisons. The Transact-SQL syntax= NULLis not supported.ANSI_WARNINGSspecifies that SQL Server issues warning messages for conditions that violate ANSI rules but do not violate the rules of Transact-SQL.ANSI_PADDINGspecifies that trailing blanks on varchar values and trailing zeroes on varbinary values are not automatically trimmed. -
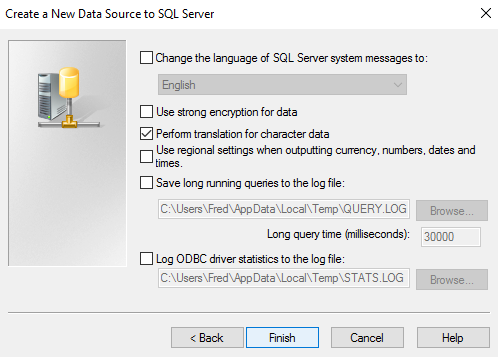
Specify any Extra Options
Modify any settings as required, then click Finish.
-
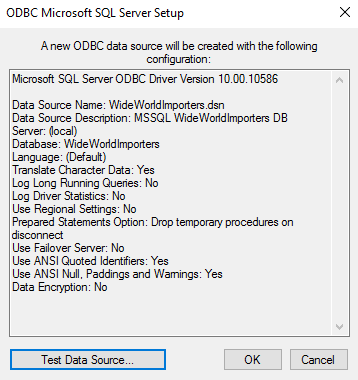
Review the ODBC Data Source Settings
Review the summary, then click OK.
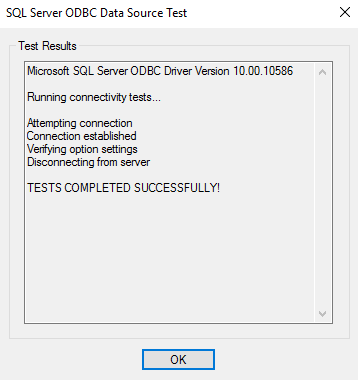
You can (optionally) click Test Data Source... first to check to see if it's going to work.
-
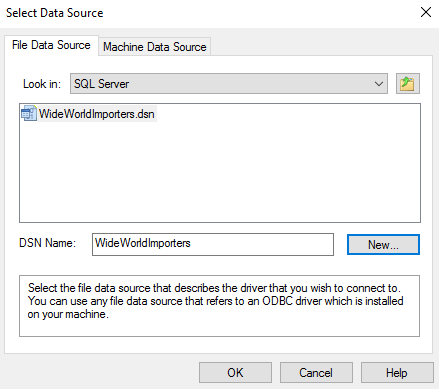
Select Data Source
We're now back at the original dialog box that asks us to select a data source.
We now have a DSN file so we can continue on and connect to SQL Server.
Ensure that the DSN file's folder is selected next to Look in and the DSN file is entered next to DSN Name, then click OK.
-
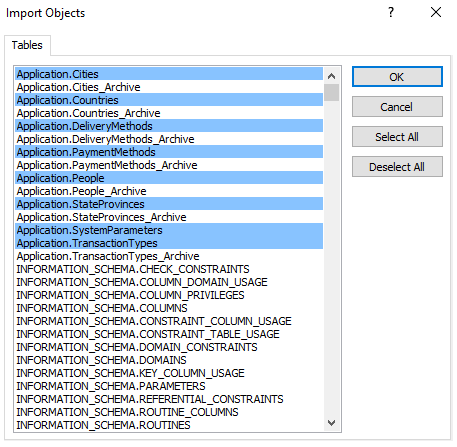
Select which Tables/Views to add to Access
The wizard displays the tables and views from SQL Server so that you can select the ones you require.
Select all tables and/or views that you want to be imported into Access, then click OK.
-
Select Unique Identifier
This screen is only displayed if Access can't find a unique identifier for a table.
If Access is unable to determine which field or fields uniquely identify a table or view, you will be prompted to set the unique identifier for that table.
Select the field/s that uniquely identify each record, then click OK.
You will need to do this for each table where the unique identifier can't be identified.
This step will set the selected fields as primary keys in Access. You can verify this by viewing the table in Design View later.
-
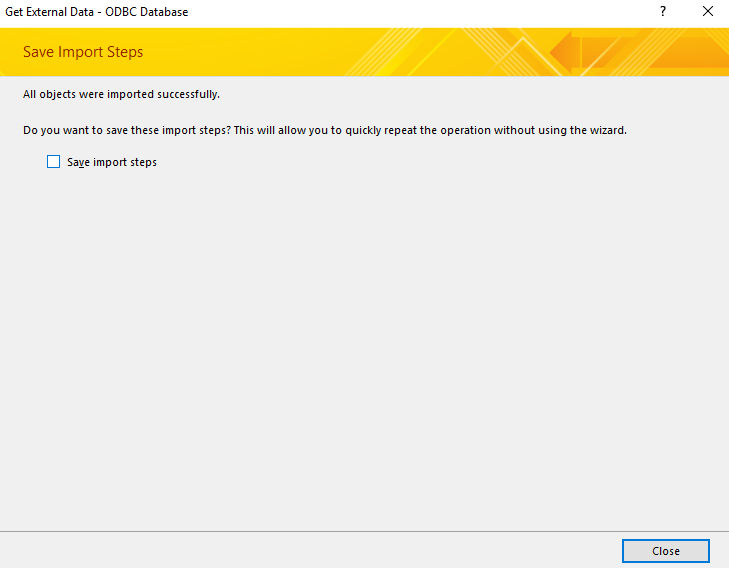
Close or Save Import Steps
The import has now completed. You can either close the wizard or save the import steps so that you can run the same import later without needing to go through all the steps in the wizrd.
To close the wizard, click Close.
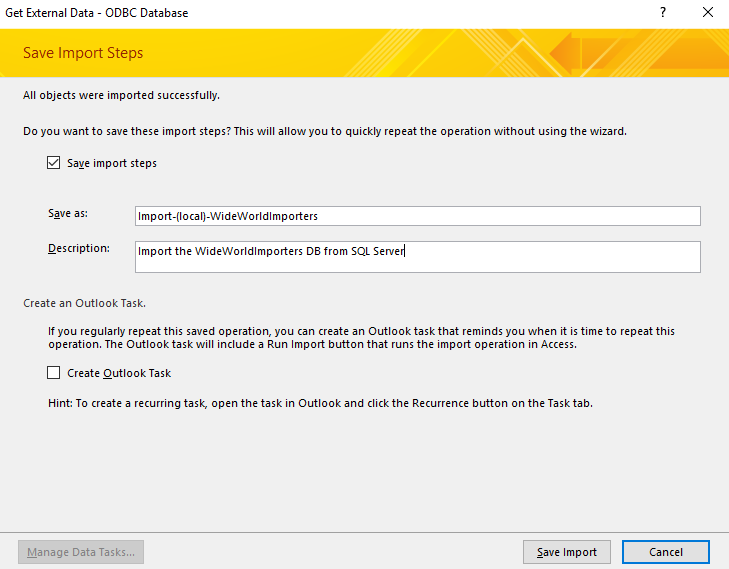
To save the import steps, click Save import steps, enter a name and description, optionally select Create Outlook Task, then click Save Import.
-
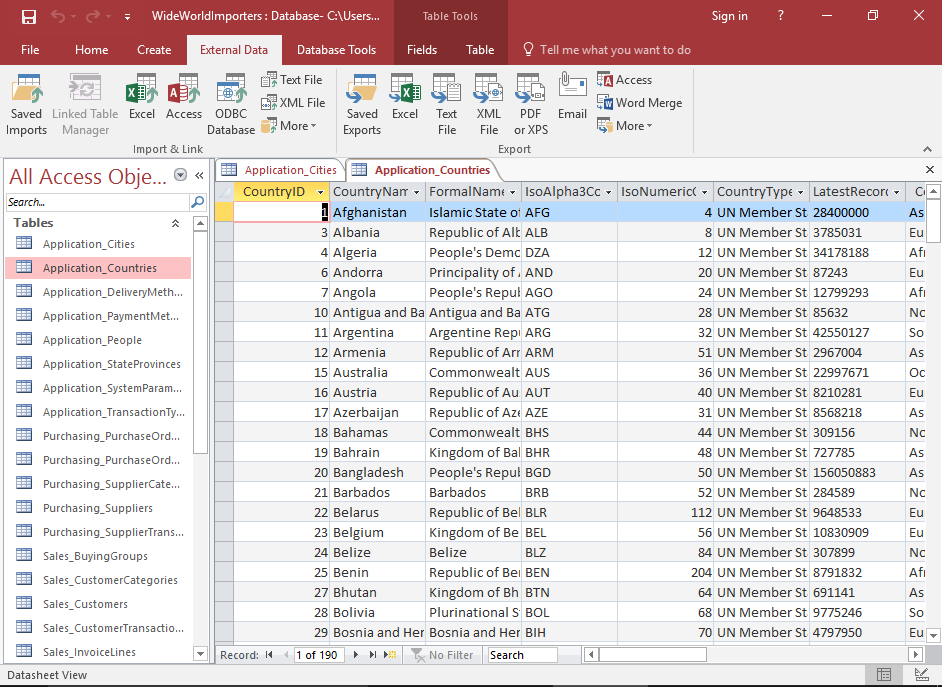
The Result
The imported tables now appear in the left Navigation Pane.
The table names are prefixed with the schema name from the SQL Server database. For example, in SQL Server, a table might be Application.Cities, whereas, the imported table would be called Application_Cities.
The database has now been imported from SQL Server. You can now make any change to the database in Access without impacting on the original database in SQL Server.
About the SQL Server Database in the Above Example
The SQL Server database used in the above example is the WideWorldImporters database. This is a sample database provided by Microsoft's SQL Server team for the purposes of demonstrations, training, etc. If you'd like to install this database to SQL Server, I have step-by-step instructions here.