Access 2016: Add a Combo Box to a Form
Access provides a "Combo Box Wizard" to walk you through adding a combo box to a form.
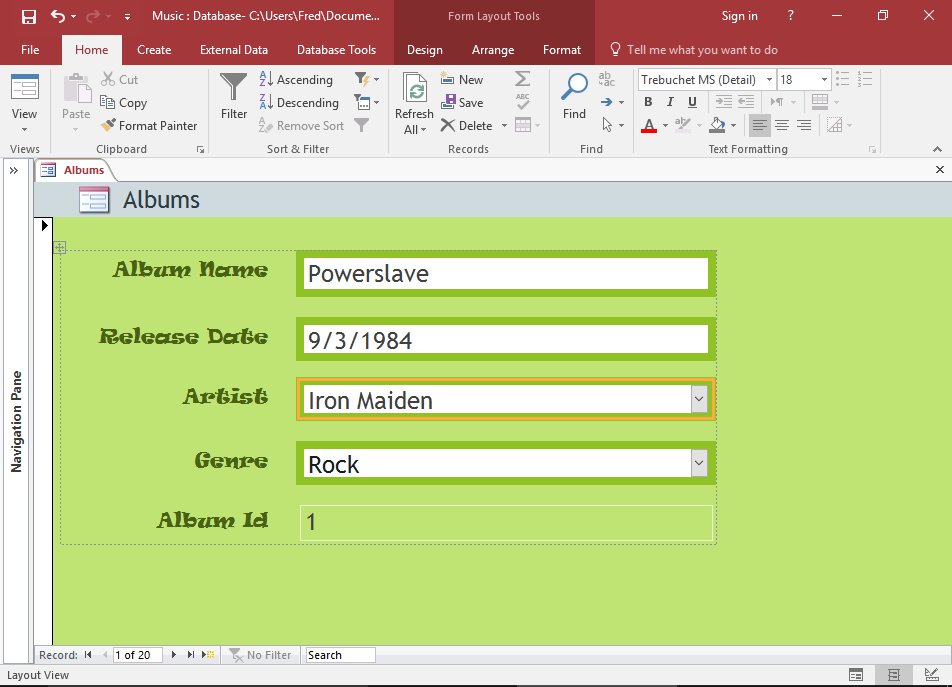
Now that we've created our form, we could go right ahead and enter data.
But we might encounter a small issue. We'll have to remember the artist IDs of all artists. This is because the only artist information on the form is the ArtistId. The artists' names are nowhere to be seen.
This means we'll need to enter the artist ID for every album we enter.
This could become an inconvenience. Whenever we enter a new album, unless we remember the ID of every artist, we'll probably need to open up the Artists table to look up the ArtistId for the album we're entering.
Time for a slight redesign of the form.
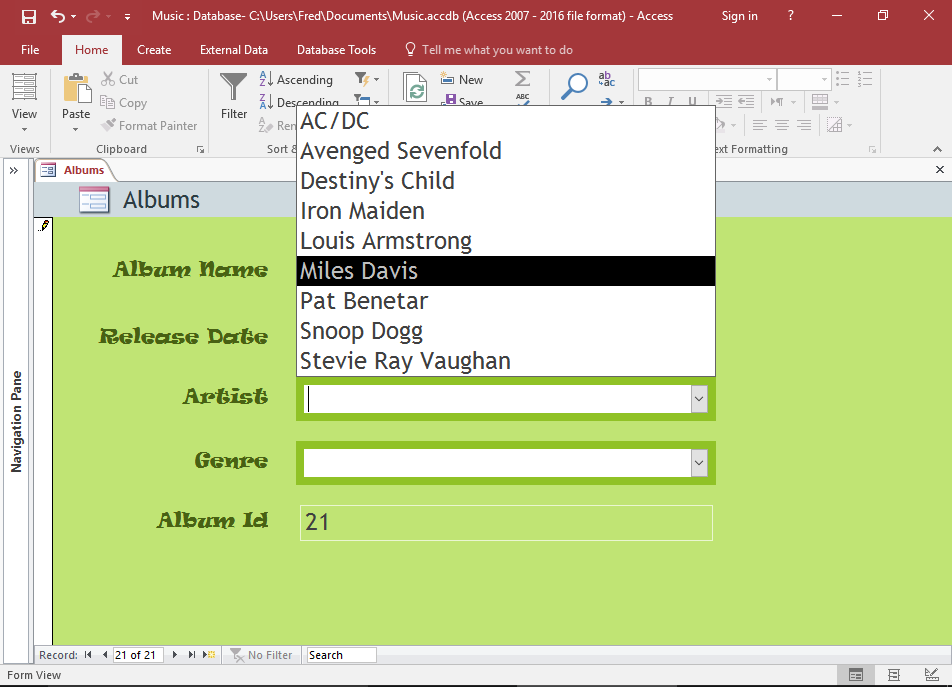
Add a Combo Box with the Artists' Names
Here, we will add a combo box containing a list of all artists' names to the form. This will allow users to select artists by their name, rather than their ID. However, the form will still insert the ID into the Albums.ArtistId field.
-

Add the Form Control
Open the form in Layout View.
Click the Combo Box icon from the Design tab on the Ribbon.
Now click the form in the location that you want the combo box to be inserted. The Combo Box Wizard will open.
Before you click, as you hover your cursor over the form, Access will display a red line wherever you move the cursor, to help you see where the combo box will be inserted.
-

The Combo Box Wizard: Select a source for the Values
As mentioned, clicking on the form automatically opens the Combo Box Wizard.
Select the first option: I want the combo box to get the values from another table or query and click Next >
-

Select a Table
Select Table: Artists and click Next >
-
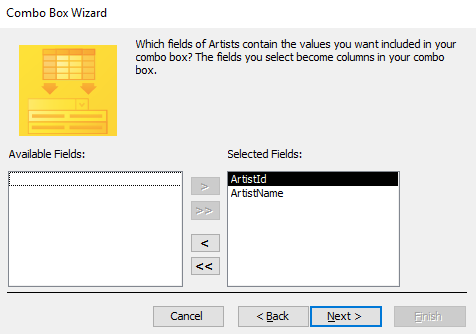
Select Fields
Click >> to move both fields across to the right pane, then click Next >
-

Select Sort Order
This determines the order in which the items will appear in the list. We'll order them by the artists name.
Select ArtistName and Ascending, then click Next >
-
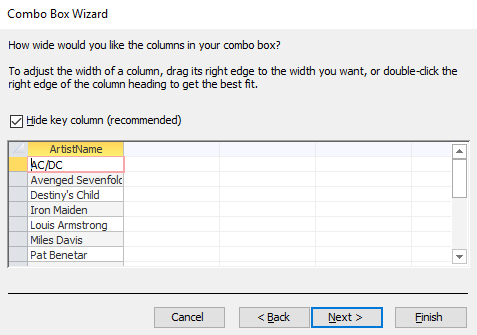
Column Width
Adjust the column width as desired then click Next >
-
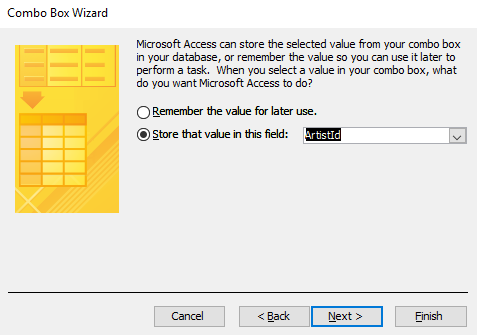
Select where to store the Value
Click Store that value in this field: and select ArtistId
Then click Next >
This means that the ArtistId for the selected artist will be inserted into the Albums.ArtistId field.
So even though the user only selected the artist's name from the combo box, the ID is what's inserted into the table.
-
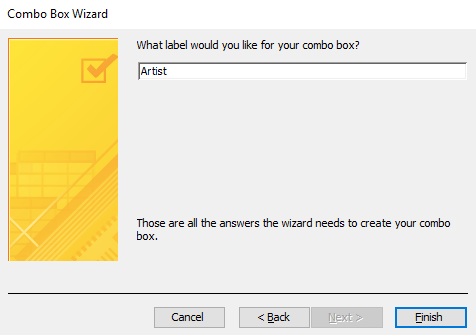
Combo Box Label
Type a label for the combo box and click Finish
-
The Combo Box
Access will close the wizard and you'll see the form with the new combo box.
Delete the old Control
-
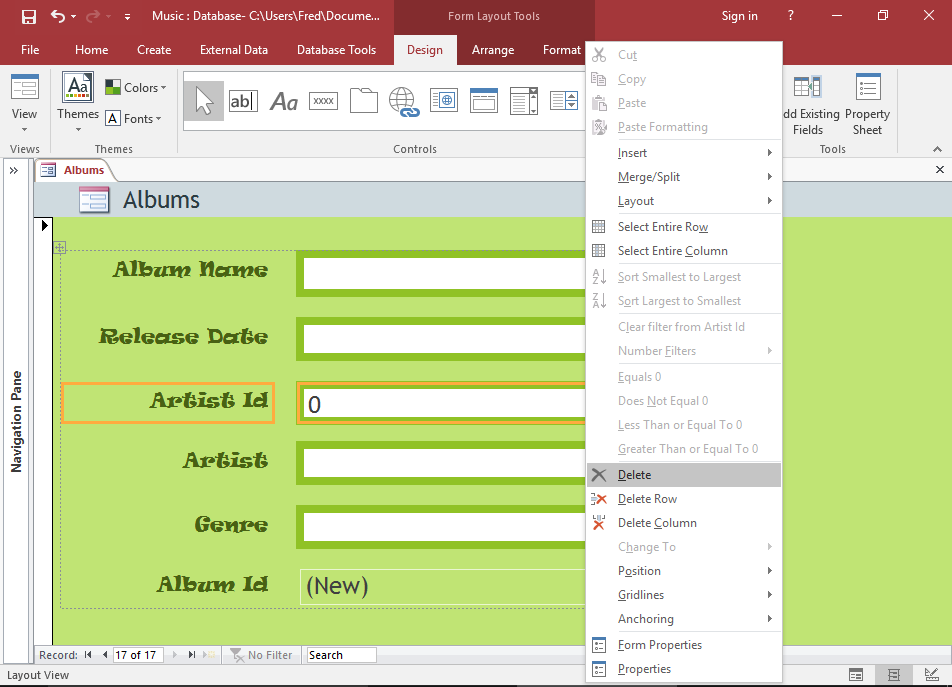
You have the option of keeping the ArtistId form control or removing it.
To delete the old control (and its label) click on each one while holding down the Shift key. Then right-click and select Delete from the contextual menu.
Test the Form/Combo Box
Go ahead and use the form to add new records to the database — now's your chance to add something from the last 25 years ;).
-
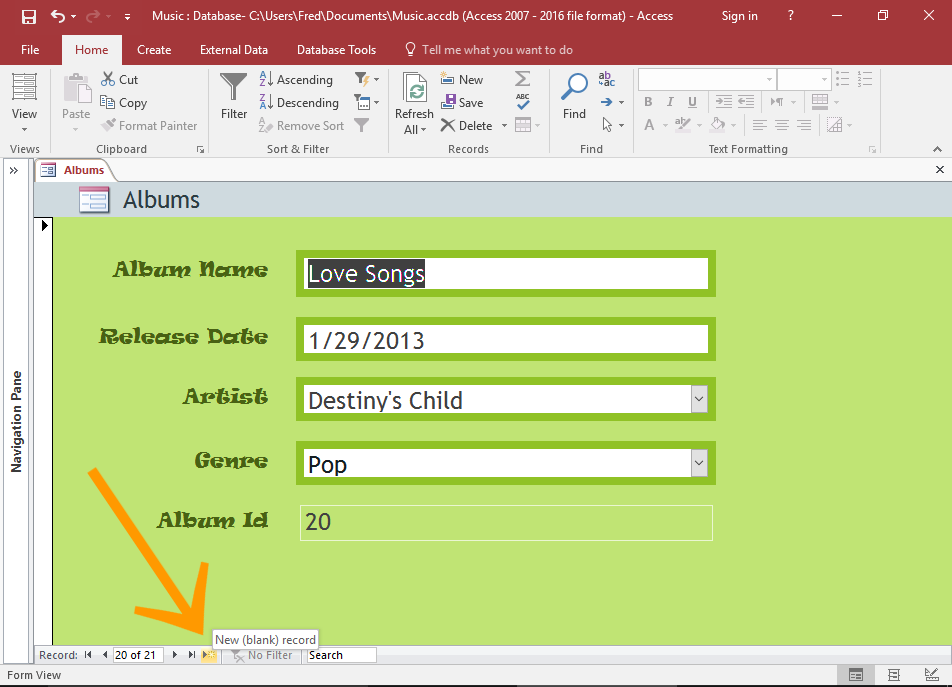
Go to a New Record
Switch to Form View (either by clicking the View button on the Ribbon, or the Form View icon at the bottom right of the screen) and open a blank record.
To open a blank record, click the New (blank) record icon at the bottom of the screen.
-
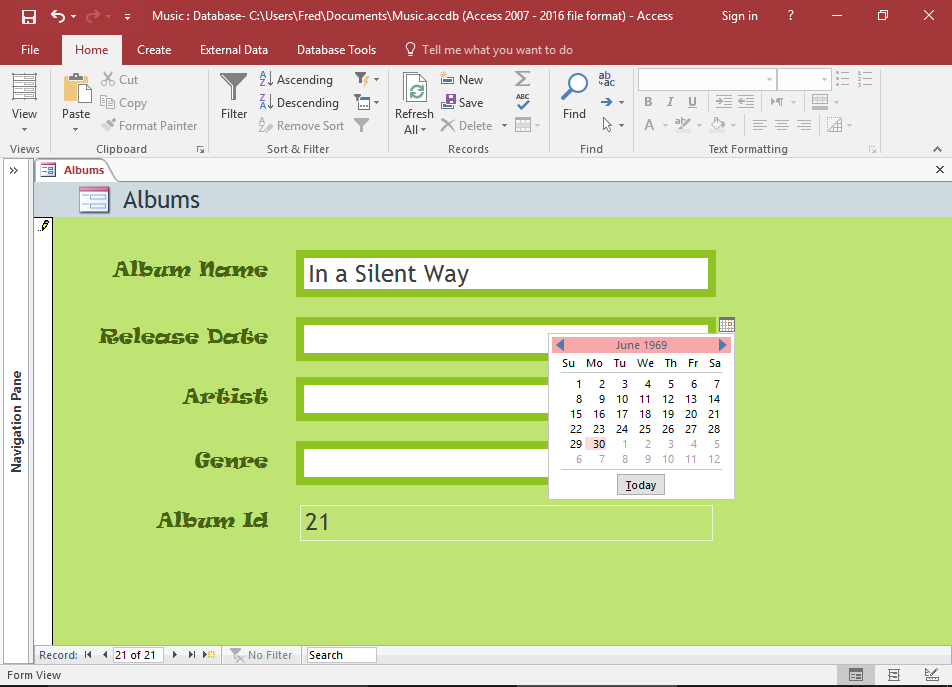
Enter Data
Enter data as a user would.
Tabbing or pressing Enter past the last field will submit the form and insert the contents into the table.
Note that, to display the date picker icon, you'll need to click inside the Release Date input control.