Access 2016: Export Data from Microsoft Access
You can export data from Access to a variety of formats by using the External Data tab on the Ribbon.
Access 2016 includes options for exporting data to other sources. You can export to a variety of formats, including:
- Excel file
- Text file (CSV, TSV, etc)
- XML file
- PDF file
- XPS file
- Word document
- Sharepoint list
- HTML document
- Another Access database
- ODBC datasource (such as SQL Server)
You can export from a table, a query, a form, or a report.
Today we'll export two different queries to two different formats:
- We'll export our Iron Maiden Albums query to an Excel spreadsheet.
- We'll export our Albums from the last 25 years query to an XML file.
Export a Query to Excel
Let's export the results of the Iron Maiden Albums query that we saved previously.
In this case, we'll export the query results to an Excel spreadsheet.
-
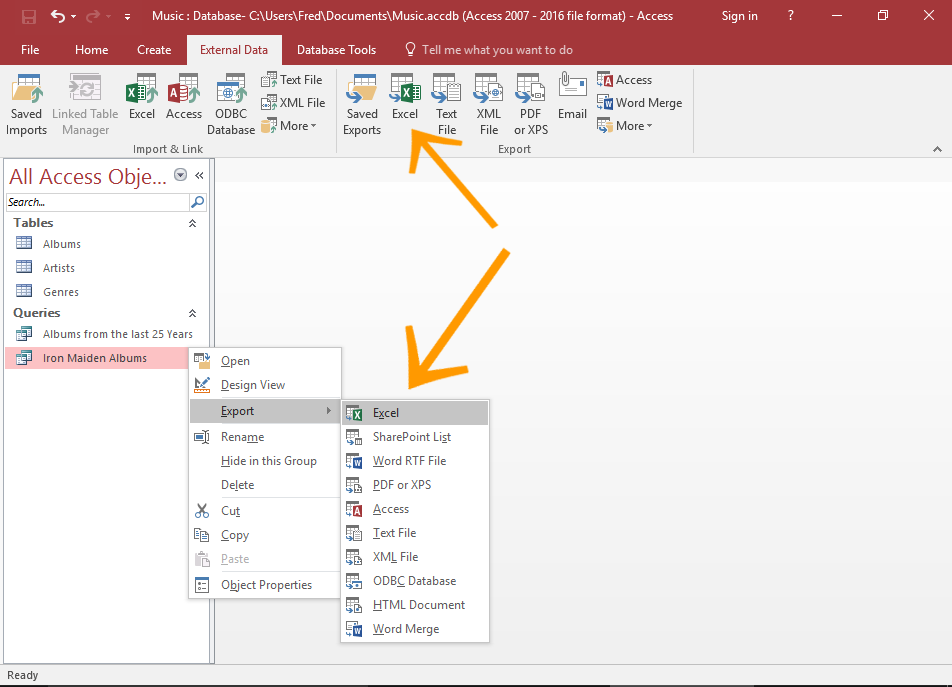
Launch the Export Dialog
Right-click on the query in the left menu (in our case, the Iron Maiden Albums query) and select Export > Excel from the contextual menu.
Alternatively, you can select the query in the left menu, then click Excel from the export options in the Ribbon (on the External Data tab).
-
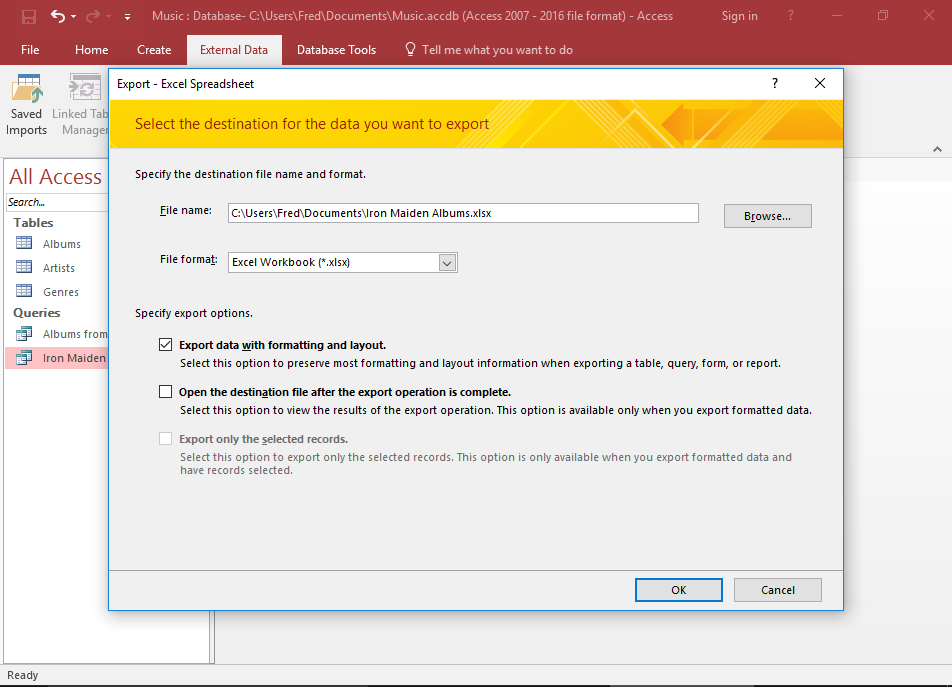
Export Options
Review the options. In our case, we'll keep the file name as Access has suggested. However, we'll put a tick next to Export data with formatting and layout.
Click OK to export the data.
-
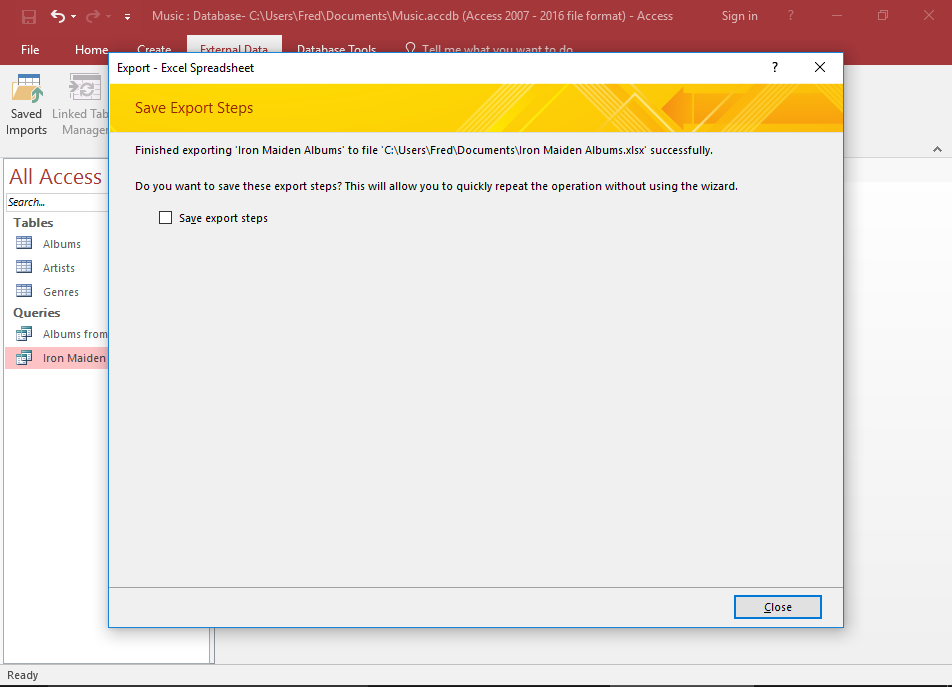
Save Export Steps?
Access gives you the option of saving the steps you just took, so that you can re-run them again later.
In our case, we'll give it a miss. Click Close to finish.
-
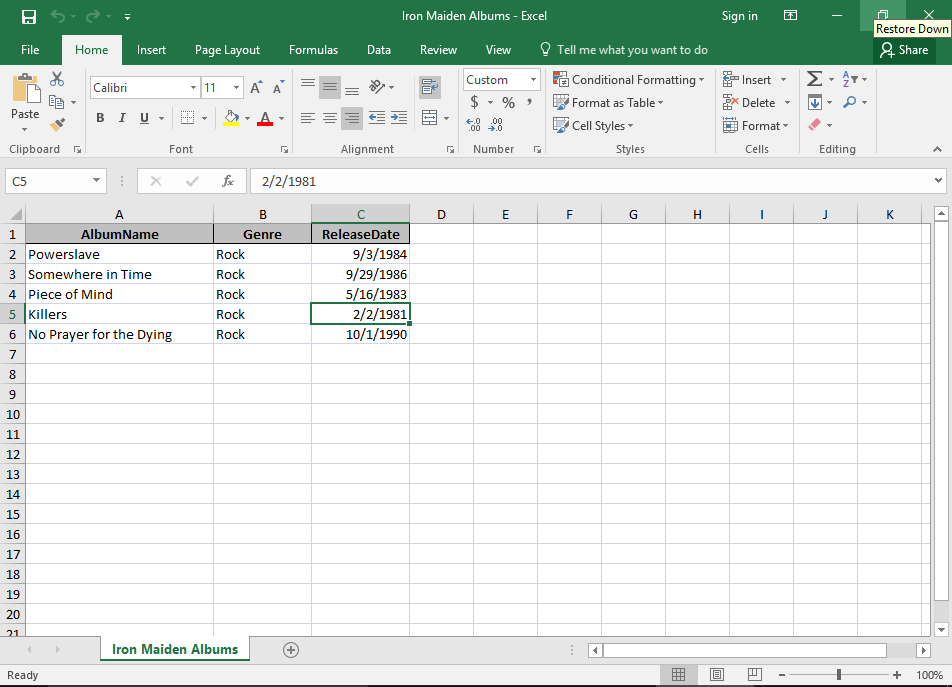
View the Exported File
You can now check your exported file in Excel. Navigate to the location you chose at step 2 and open the file.
You can save yourself from having to navigate to the file by checking Open the destination file after the export operation is complete at step 2.
Export to an XML File
Now we'll export our Albums from the last 25 Years query (that we built with the Expression Builder) to an XML file.
-
Launch the Export Dialog
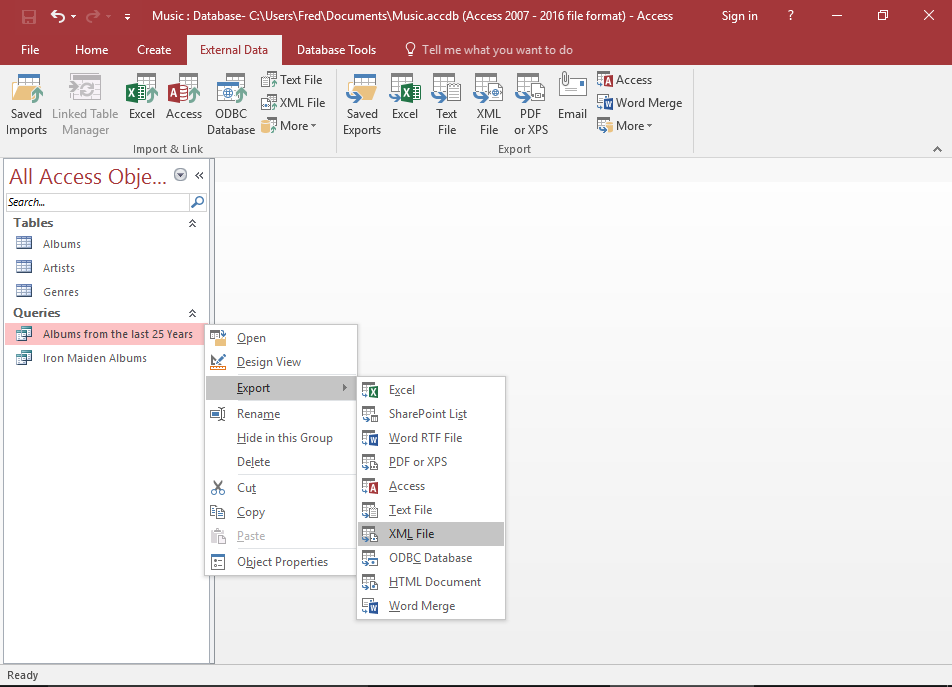
Right-click on the query in the left menu (in our case, the Albums from the last 25 Years query) and select Export > XML File from the contextual menu.
Alternatively, you can select the query in the left menu, then click XML File from the export options in the Ribbon (on the External Data tab).
-
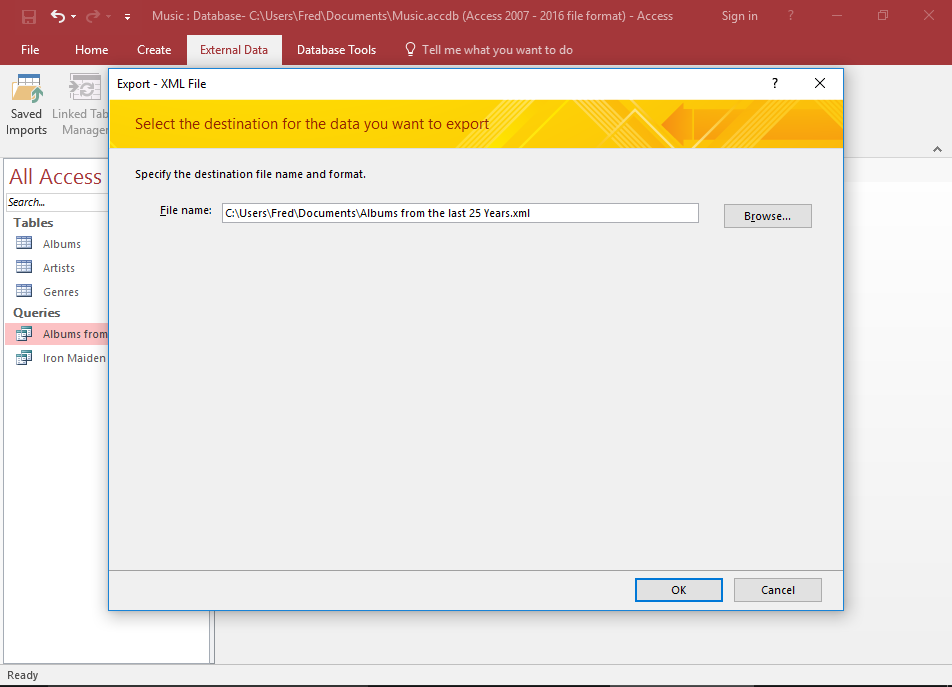
File Destination
Review the file destination. In our case, we'll keep the file name and destination as Access has suggested.
Click OK.
-

Select Export Information
Review/change the export information as required. In our case, we'll just keep the first two options checked. This will generate two files: the XML file and an XSD file (which will hold rules, such as the data types).
Click OK to export the files.
-
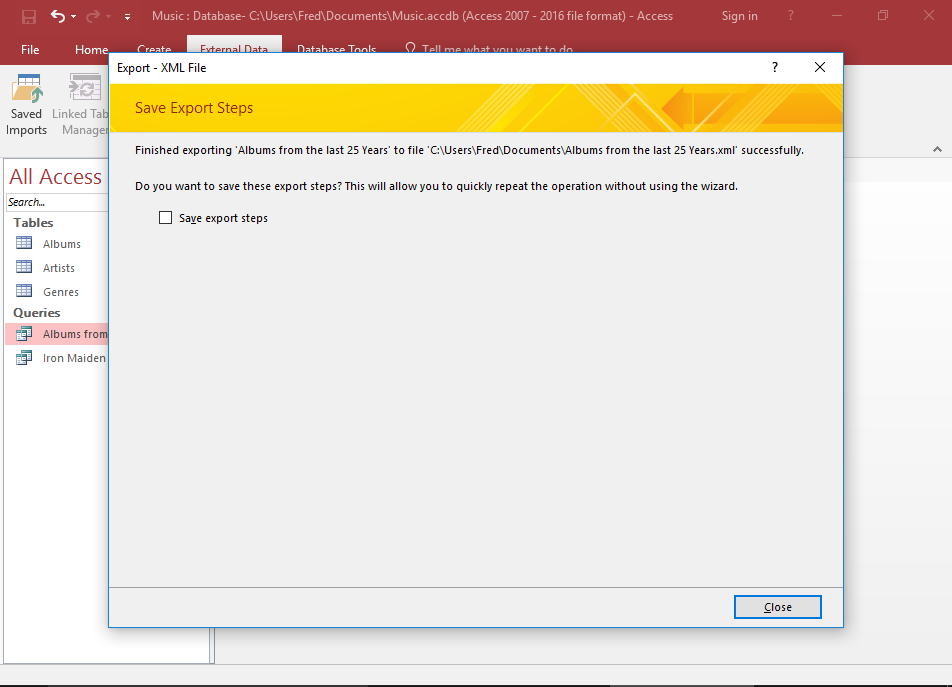
Save Export Steps?
Access gives you the option of saving the steps you just took, so that you can re-run them again later.
In our case, we'll give it a miss. Click Close to finish.
-
Review the File/s
Navigate to the location you chose for the files and open them.
The XML File
Here's what the resulting XML file contains — all two albums from the last 25 years:
The XSD File
The XSD file contains the schema for the XML file. The schema defines rules about the structure of the data. Here's what the resulting XSD file contains: