CSS Tutorial
Also see the full length CSS tutorial.
Advantages of CSS
Saves time
When most of us first learn HTML, we get taught to set the font face, size,
colour, style etc every time it occurs on a page. This means we find ourselves
typing (or copying & pasting) the same thing over and over again.
With CSS, you only have to specify these details once for any element. CSS will automatically apply the specified styles whenever that element occurs.
Faster pages
Less code means faster download times.
Maintenance
To change the style of an element, you only have to make an edit in one place.
Superior styles to HTML
With CSS, you have much better control over the layout of your web pages. You can specify exactly how big a font will be, exactly where an element will be on a page, what the page will look like when printed, and much more.
Disadvantages of CSS
Browser compatibility
Browsers have varying levels of CSS support.
Fortunately, recent browser versions are more compliant than their earlier counterparts.
Coding
Selectors and Declarations
You code CSS by declaring a set of rules. A rule can be as simple as this:
This means that all text surrounded by <H1></H1> will be blue.
Rules are made of up of selectors and declarations. In the above example, H1 is the selector, the rest is the declaration and consists of a property (color), and a value (blue).
Any HTML tag can be used as a selector.
Classes and ID's
CSS also enables you to make up your own classes. This means that, for a given HTML tag, you can apply different formatting depending on its class.
Media Types
You can define a separate style sheet for different media types. The names of the different media types are:
- all
- aural
- braille
- embossed
- handheld
- projection
- screen
- tty (for media using a fixed-pitch character grid)
- tv
Commenting your code
You should always comment your code. The way to make comments within a style sheet are by using /* at the start of the first line, and */ at the end. Example:
/* this is a comment */
Implementing
There are 4 ways of implementing CSS.
-
Inline
Style sheet information is applied to the current element. Instead of defining the style once, then applying the style against all instances of an element (say the <P> tag), you only apply the style to the instance you want the style to apply to.
For example:
-
Embedded
You embed CSS information into an HTML document using the 'style' element. You do this by embedding the CSS information within <style>...</style> tags in the head of your document.
For example, place the following code between the <head>...</head> tags of your HTML document:
Now, whenever any of those elements are used within the body of the document, they will be formatted as instructed in the above style sheet.
-
External Style Sheets
An external style sheet is a separate file where you can declare all the styles that you want to use throughout your website. You then link to the external style sheet from all your HTML pages. This means you only need to set the styles for each element once. If you want to update the style of your website, you only need to do it in one place.
For example:
-
Type the following into a plain text file, and save with a .css extension (eg, external_style_sheet.css).
- Add the following between the <head>...</head> tags of all HTML documents that you want to reference the external style sheet.
-
-
Importing Style Sheets
You can use the @import rule to import rules from other style sheets.
Add either of the following between the <head>...</head> tags of all HTML documents that you want to import a style sheet into.
Exercise
In this excercise, we will create two files; an HTML file, and a CSS file. We'll then link the two files together.
-
Create an HTML document using the code below, and save it as 'cooltafe.html':
(Note: TAFE college is a way cool learning institution... ;o) -
Create a new file called, 'csstalk.css' and type the following:
-
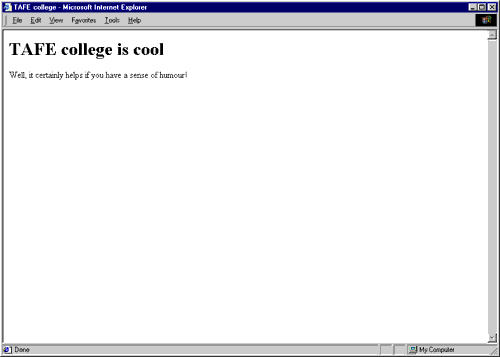
View the HTML page in your browser. It should look like this:

-
Finally, add the following line of code between the
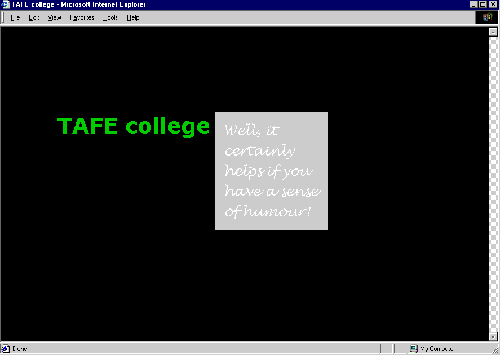
</TITLE>tags and</HEAD>tags in the HTML file.Save the file and refresh your browser. It should look like this:

Summary
That almost wraps up this CSS tutorial. Today we learned that CSS stands for Cascading Style Sheets and that it is used for applying styles to web pages. We learned how to code and implement CSS using the "inline", "embedded", and "external" method. We finished by creating an example using the "external" method.
Next steps
There's much more to learn about CSS than what was covered here. If you enjoyed this CSS tutorial, check out the following:You can also download the CSS2 specifications from the W3C web site. It's quite a large document (207 pages for the text version!), but at least you're getting the info from the horse's mouth.