Design View in Microsoft Access 2013
So we've just created a table. We did that in Datasheet view. We can also view the table in Design view.
What Is Design View?
Design view enables you to design and set up your database (kind of a "behind the scenes" view of your database). This is where you set up and configure your tables, forms, reports, etc.
As you continue working with MS Access, you will find yourself switching between Design view and Datasheet view (or in the case of forms, Layout view) often. So it's good to familiarize yourself with this concept early on.
Switch to Design View
The following steps demonstrate how to switch to Design view.
- Click on the View icon at the top left (just under the File menu). The View icon currently looks like this:

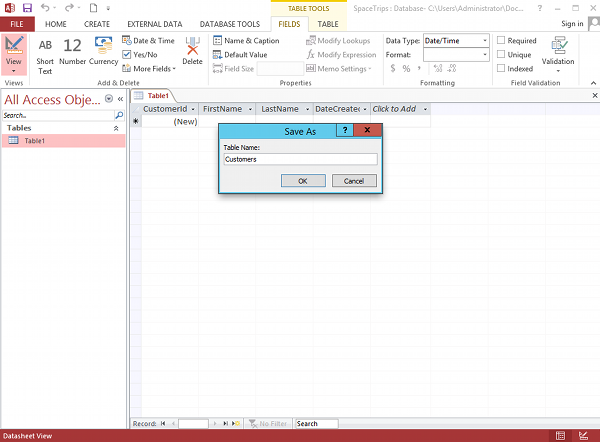
- At this point, Access will ask you to name and save the table you just created. Type Customers and click OK:
- You are now looking at your Customers table in Design view. Click on the DateCreated field, then in the bottom pane, enter =Now() in the Default Value field. Also click in the Format field and select General Date from the contextual menu:

We have just set a default value for the DateCreated field. This means that, whenever a new record is entered, this field will automatically be populated with the current date and time. We have also specified a format for all dates that are stored in this field.
You can see that we have configured just two of many options in this pane. These options can be used to further specify exactly what type of data can be entered into the database as well as any constraints or defaults that you'd like to set against each field. Some options include restricting the length of data (under Field Size), setting a default value (which we've just done), specifying whether it is a required field, and more.
In practice, you will probably want to tighten some of these rules down - like specifying whether a field is a required field or not (i.e. can't be left blank). But for the purposes of this tutorial, we won't get too fussy.
You'll also see that the Ribbon now has a DESIGN tab with a new set of design-related options.
Primary Key
You might have noticed the little "key" icon to the left of the CustomerId field. This indicates that the field is a primary key. A primary key ensures that the data in this column is unique - no two values can be the same. This is important for when you want to perform queries or run reports against the table, and it is vital for establishing relationships with other tables.
Expression Builder
You can also click on the little ... button that appears whenever you click in the Default Value field (and other fields too). Clicking on this button opens the Expression Builder, which enables you to browse for a suitable function, constant, or operator to assist you in building an expression for the field.
We could just have easily used the Expression Builder to build our =Now() expression:

Switch Back to Datasheet View
Now that we're in Design view, you might have noticed that the View icon looks different - it has changed from a Design view icon into a Datasheet view icon. It now looks like this:
Click the View icon to return to Datasheet view, and we'll look at the options for adding data to our table.
There's also a tutorial for Access 2016.