Creating Layers in GIMP
Now that we've got a basic understanding of layers and their benefits, let's create a new layer.
Displaying The Layers Dialog Box
Before you start working with layers, it's best to open up the Layers dialog box.
You can display the Layers dialog box by selecting Dialogs > Layers from the image you're working with.
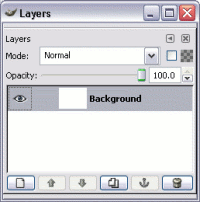
Here's what the Layers dialog box looks like:

In the above example, we only have one layer - the background layer. At least one layer is always present - when you create a new image, it already has one layer. Therefore, if you don't create any new layers you will always have at least one layer.
Creating a New Layer
Whenever I create an image, usually the first thing I do is create a new layer. If I add anything to the image, I will often create another layer. I can always combine layers later if I so wish.
To create a new layer:
-
Add a New Layer
From the Layers dialog box (above), click the New Layer icon on the bottom left of the box:

-
Name/configure the Layer

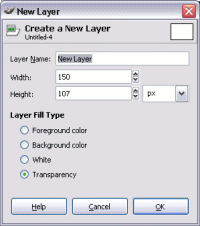
A New Layer dialog will open.
Give your layer a name, and make any other adjustments as required. For now, we'll leave everything else as is.
Click OK
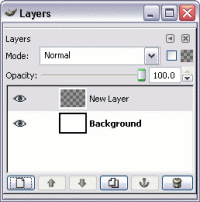
Your new layer will appear above the background layer. Like this:

You can rename the layer by double-clicking on it. Alternatively, you can right-click, then select Edit Layer Attributes.
You can also use the "Duplicate Layer" feature to create a copy of the current layer. To do this, use the "Duplicate Layer" icon located along from the "New Layer" icon. Here's what the Duplicate Layer icon looks like:![]()
What To Do With The Layer?
So, now that you've created your new layer, spend a couple of minutes trying out some layer-related tasks.
For example, try this:
- Add a second layer
- Paint something on each layer using a different color (remember, you can use the Layers dialog to switch between layers)
- Change the Opacity level on the top layer (using the Opacity slider on the Layers dialog). See what that does to your image.
- Click and drag the top layer below the other layer. See what that does to your image.
Layers And Text
When you add text to your image using the Text tool, you automatically create a new layer. If you add more text later, that will create a new layer too. This is quite handy because your text is automatically separated from the rest of your image - which as you know, provides you with more control over your image.
So, now that we know all about layers, let's look at adding text to an image.