SQL Server - Create a Login
Note that this tutorial uses the 2000 edition of SQL Server (SQL Server 2000).
For the latest version, see SQL Server tutorial.
In the previous lesson about SQL Server security, we learned that SQL Server allows for the creation of different logins for different users. These logins can be assigned to any number of roles, depending on the access that user is entitled to.
In this lesson, we will walk through the steps in creating a login.
To Create a New Login
- Using Enterprise Manager, expand the "Security" option and right click on "Logins"
- Click on "New Login"
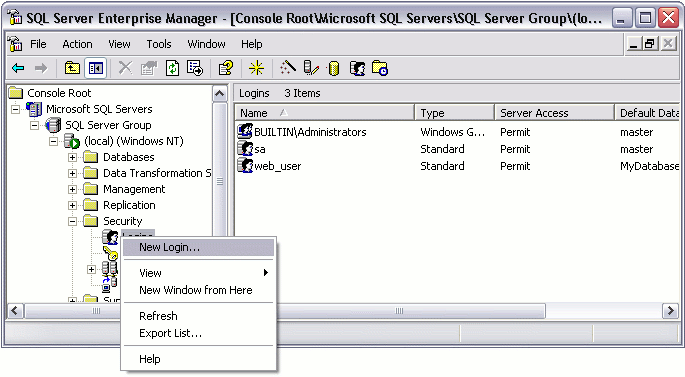
Tip: You can bypass the above steps by clicking on the "New Login" icon in the top menu
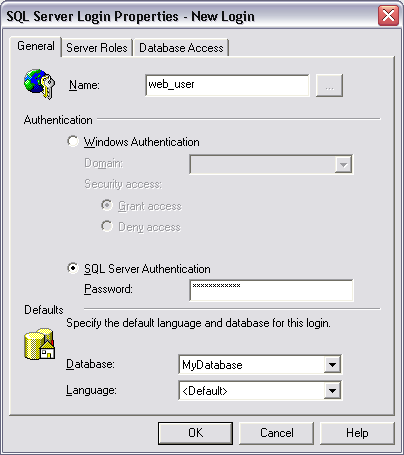
- Complete the Login Properties in the "General" tab by providing a name for the login, choosing the Authentication method (providing a password if you choose "SQL Server Authentication"), and selecting the database to use as a default. If you don't choose language, it will use the default for the current installation of SQL Server.
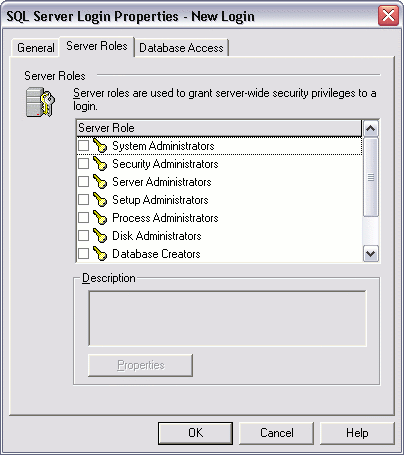
- Click the "Server Roles" tab if you need to apply any server-wide security privileges.
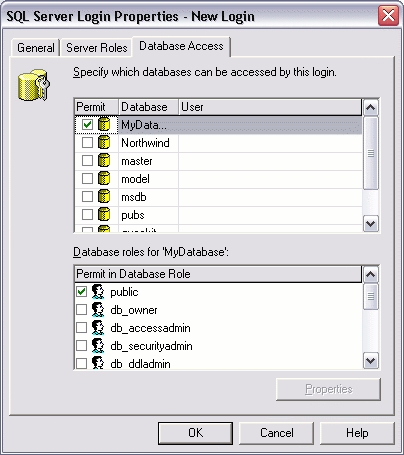
- Click the "Database Access" tab to specify which databases this login is allowed to access. By default, the login will be assigned to the "Public" role, which provides the login with basic access. If the login needs more access in one or more databases, it can be assigned to another role with greater privileges.
Note that these roles are "Database Roles" and are different to the Server Roles in the previous tab. Server Roles are for administering the SQL Server. Database Roles are created within each database and specify what the login can do within that database.