How to Create a Simple Select Query in Design View in Access 2016
The Query Design option is basically the "Design View" for queries. It offers more options for creating queries than the Query Wizard.
When creating a query, you can either click the Query Wizard button or Query Design button.
The Query Wizard is good for beginners, who are just trying to work out how to build a basic query.
However, once you've used the Query Wizard a few times, you'll probably understand enough about creating queries that you can jump over to Design View.
Clicking the Query Design button takes you to Design View. Design View enables you to quickly build a query, test it, modify it, test it again, and so on, as much as you need to.
Once you understand the basic building blocks of Design View, you'll probably never want to use the Query Wizard again for building simple queries.
Here's how to create a simple select query using Query Design.
-
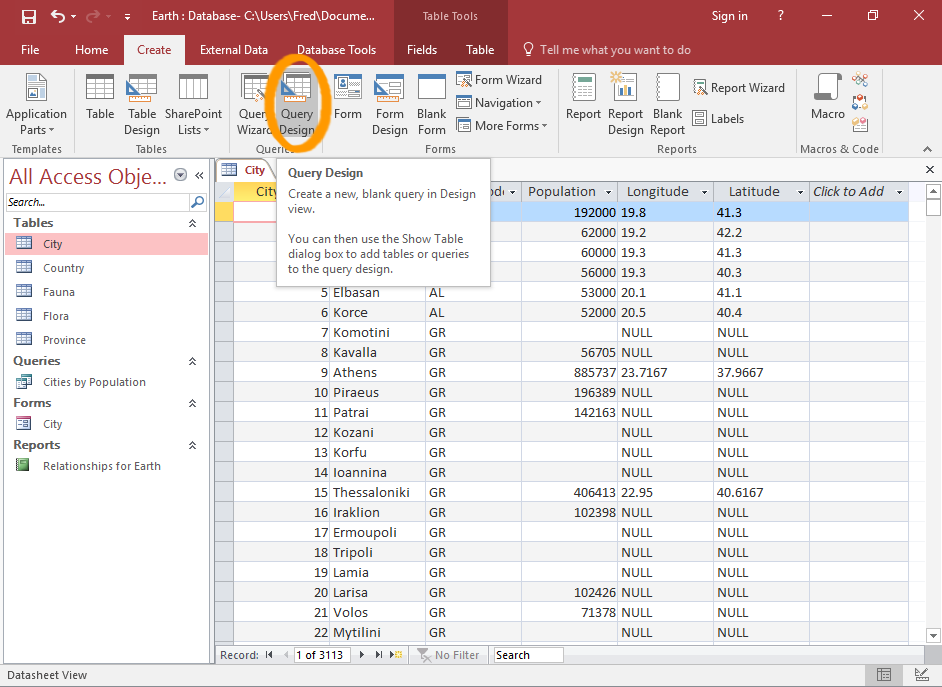
Launch Query Design View
Click Query Design from the Create tab in the Ribbon.
-
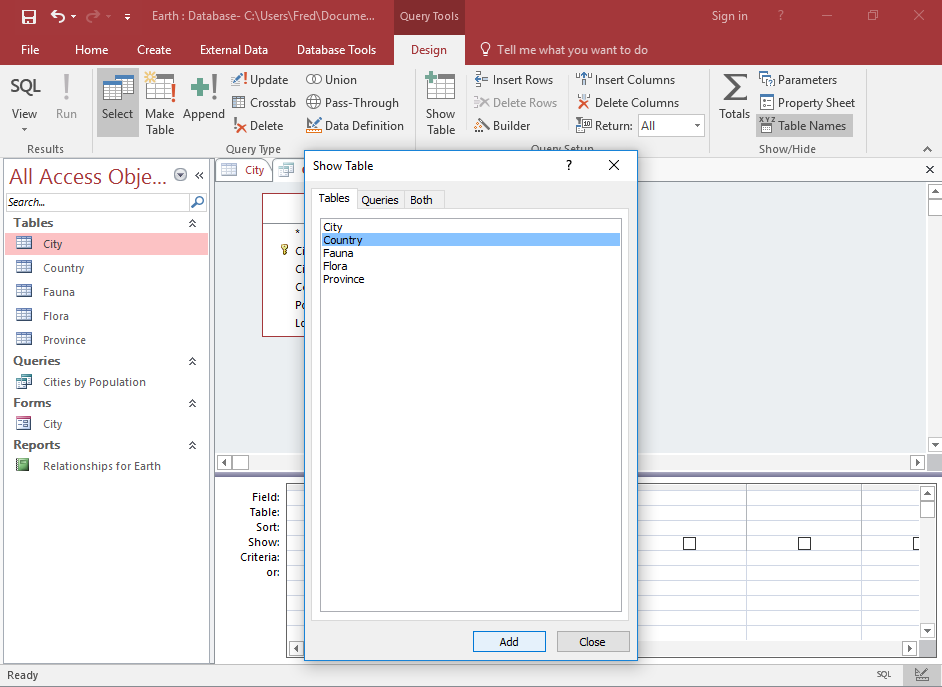
Select the Tables
Select each table that you need in the query and click Add to add it to the query.
Once you've added all the tables you need, click Close to close the dialog box.
In this example, I add the City table and the Country table.
-
Add Fields
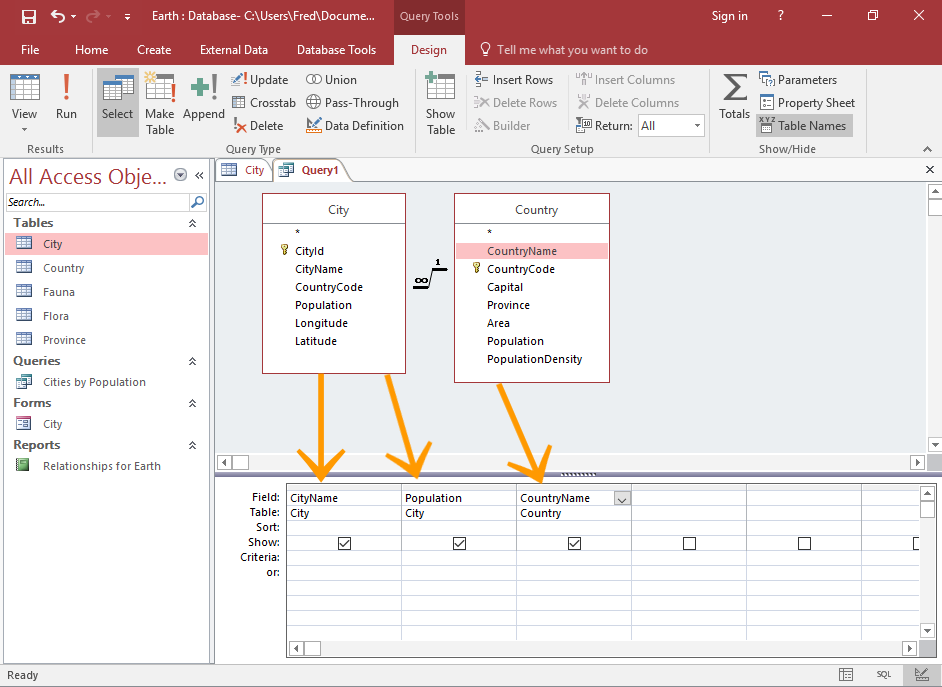
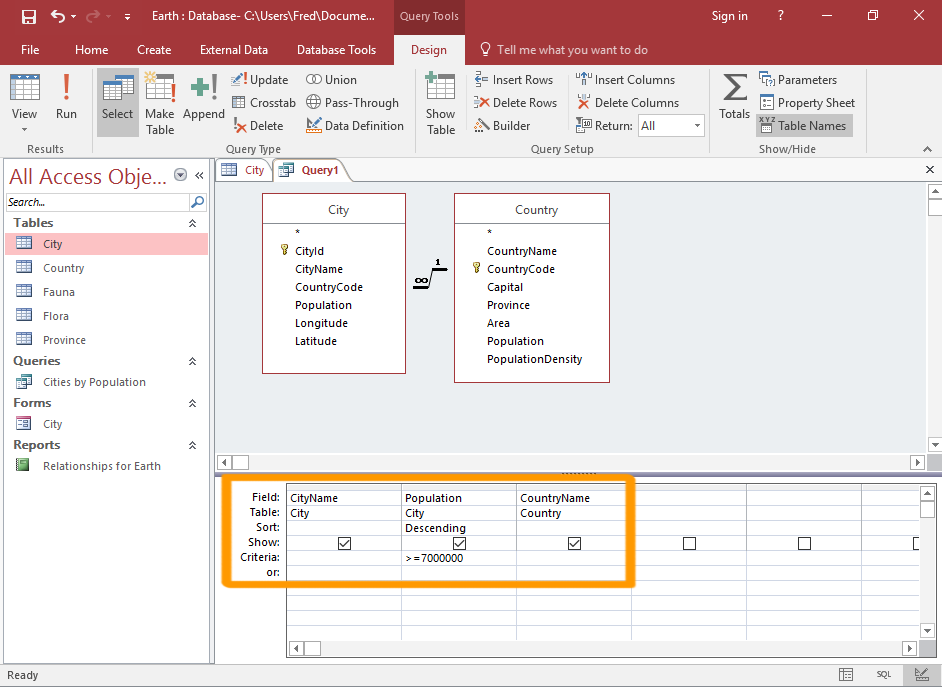
We are now in Design View.
The top pane is the Diagram Pane. It contains the tables that we selected in the previous step. These are the tables that are available for us to use in the query.
The bottom pane is the Query Pane. It contains the fields that we will actually use in the query, as well as any filtering criteria that we specify.
Double-click a field from a table in the top pane to make it appear in the bottom pane. Do this for each field you'd like in the query.
By default, the Show option is checked (in the bottom pane). This indicates that the field will be displayed when the query runs.
You could run the query now if you wanted. However, most of the time, you'll probably want to add some filtering criteria to the query.
-
Enter Criteria
Now that we've added the fields to include in the query, we can add criteria against those fields.
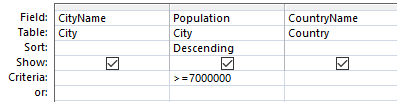
To specify a sort order, click in the Sort row for the field you'd like to sort by, and choose Ascending or Descending.
To apply filtering criteria against a field, add that criteria into the Criteria row for that field.
In this example, the query will return all cities where the population is greater than or equal to 7 million. It will also sort it by population in descending order.
You can also uncheck the Show option to apply criteria against a field that isn't actually displayed in the results.
For example, we could modify our query so that the population is not displayed in the results, even though it is used as a filtering criteria.
-
Run the Query
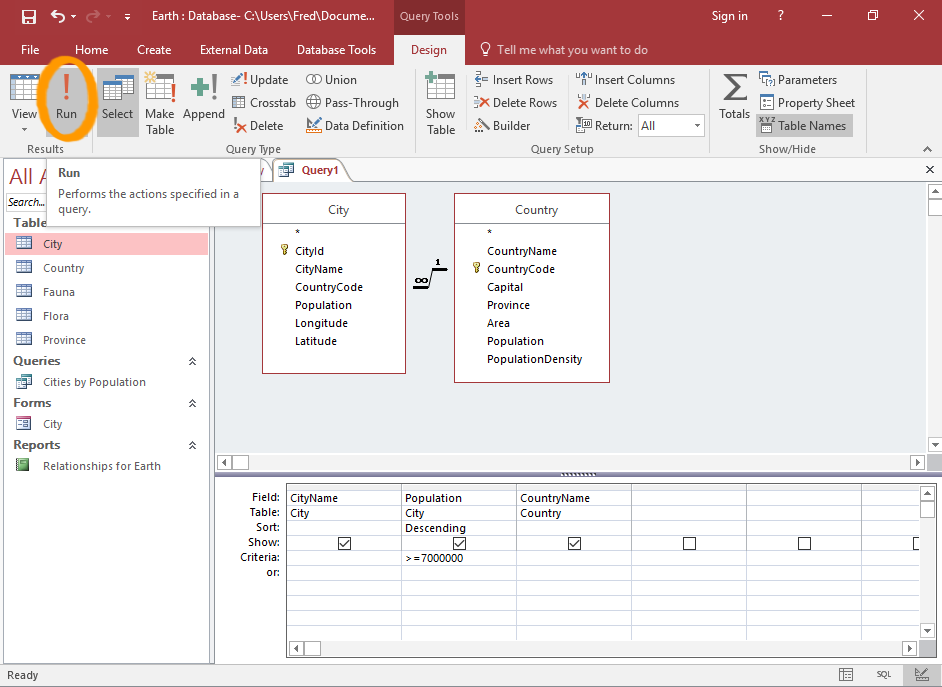
Click !Run in the Ribbon to run the query.
You can also run the query simply by switching to Datasheet View using the View button on the Ribbon, or the Datasheet View icon in the bottom right corner of Access.
-
The Result
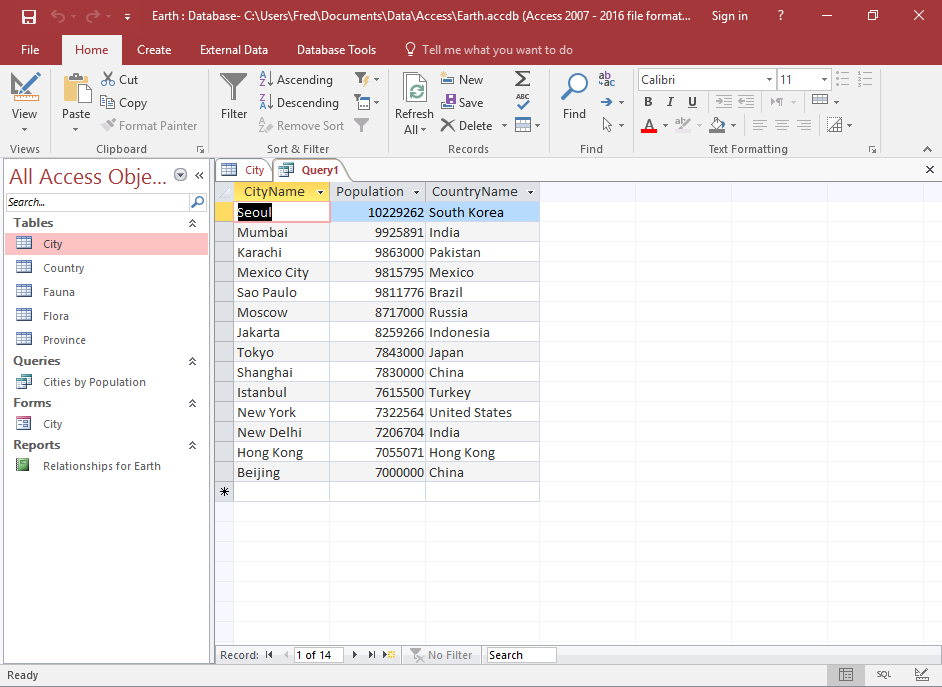
The query displays the results in Datasheet View.
All fields that have had Show checked are displayed.
All criteria is also applied. In our example, only cities with a population of at least 7 million are displayed. Also, all three fields are displayed, sorted by population in descending order.
You can switch back and forth between Datasheet View and Design View to modify/test your query as often as you like.
Save the Query
If you plan to run the query again in the future, you should save it.
Saving a query is just like saving any other database object.
-
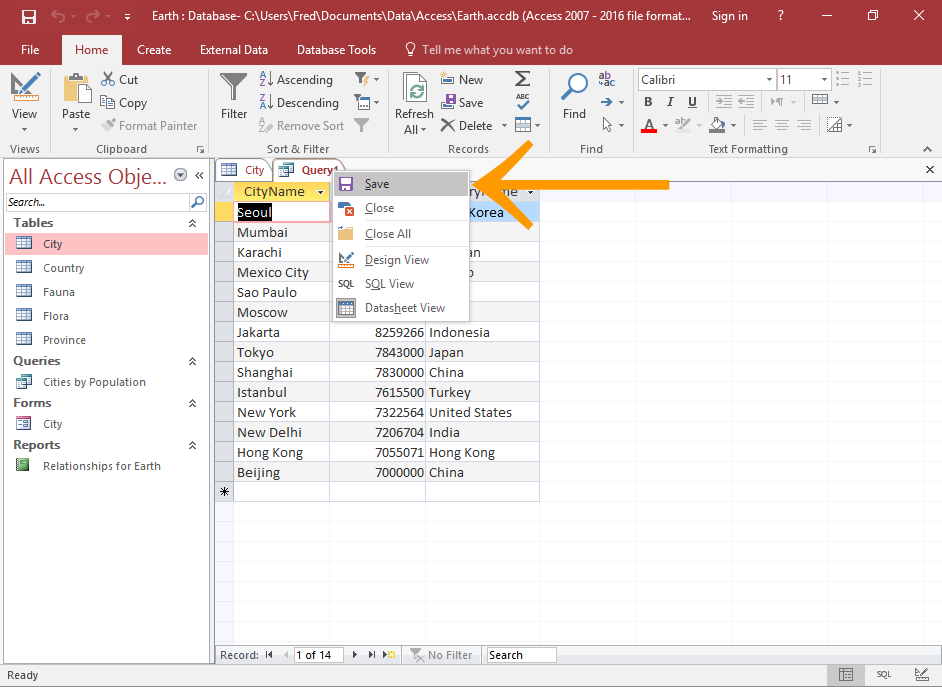
Initiate the "Save" Prompt
Right-click the query tab and select Save from the contextual menu.
You can also close the query to initiate the
-
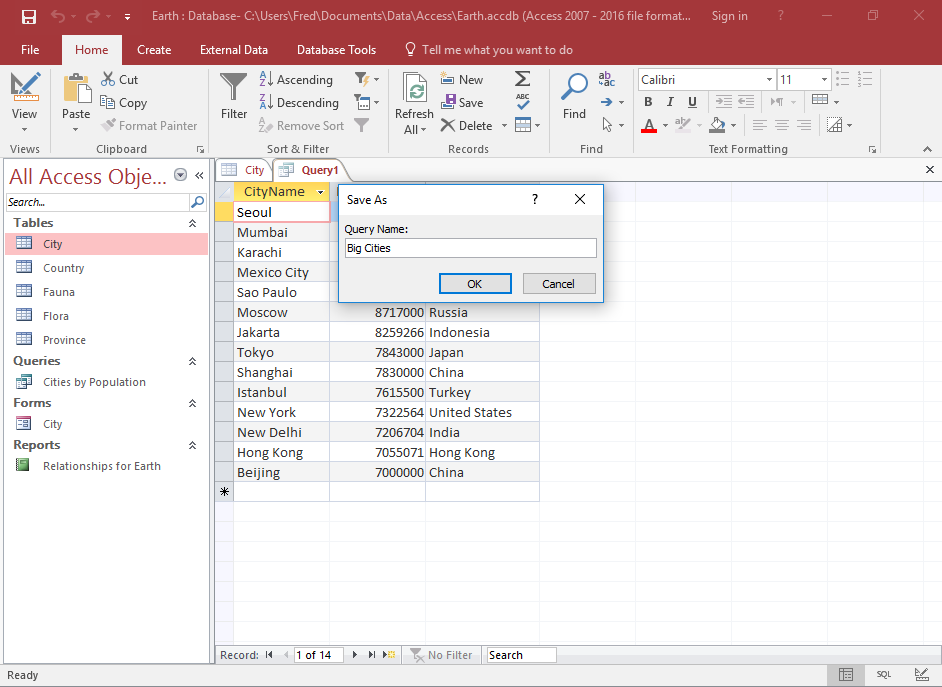
Name the Query
Provide a name for the query and click OK.
-
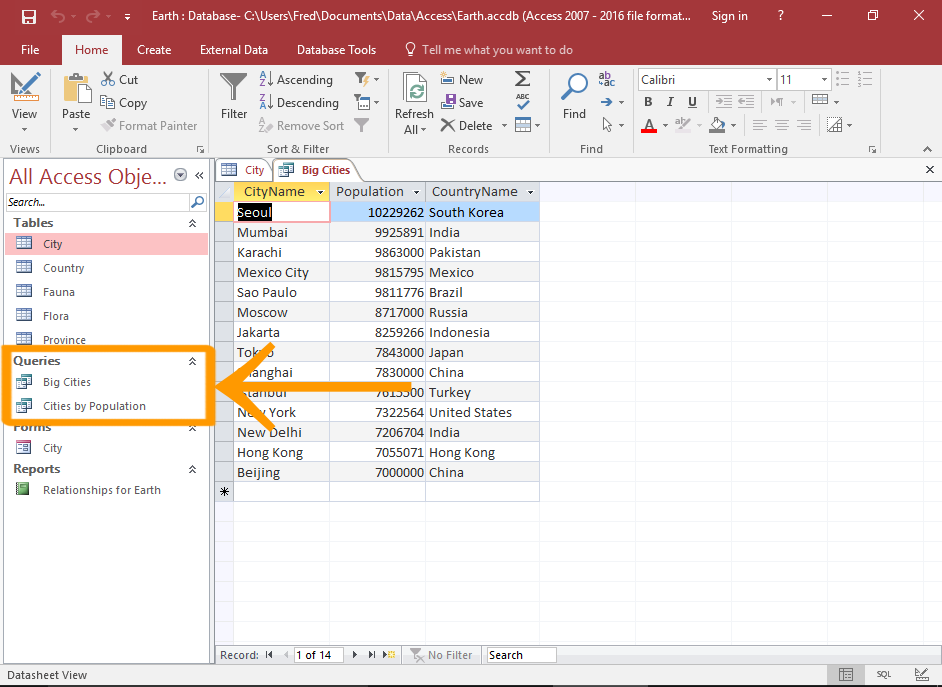
The Saved Query
The query is now added to the left Navigation Pane, under a Queries heading (unless you've customized Access to display things differently).
Once saved, you can go back and modify the query at any time by right-clicking it in the Navigation Pane and selecting Design View.
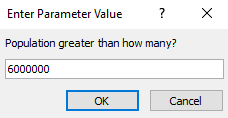
Convert it to a Parameter Query
Turn the above query into a parameter query by asking the user to enter a population number to use.